Mixing Old & New: Close to My Heart Celebrate Today and Shimelle's Glitter Girl!

Hello there, friends! I have to say, I am pretty good at purging my supplies, but I do hold onto a few cherished collections, like any that my friend Shimelle has created with American Crafts! I still have products going back to her first collection!

CTMH-Meghann-Andrew-Close-to-My-Heart-Celebrate-Today-Collection-Birthday-Pockets-05.jpg

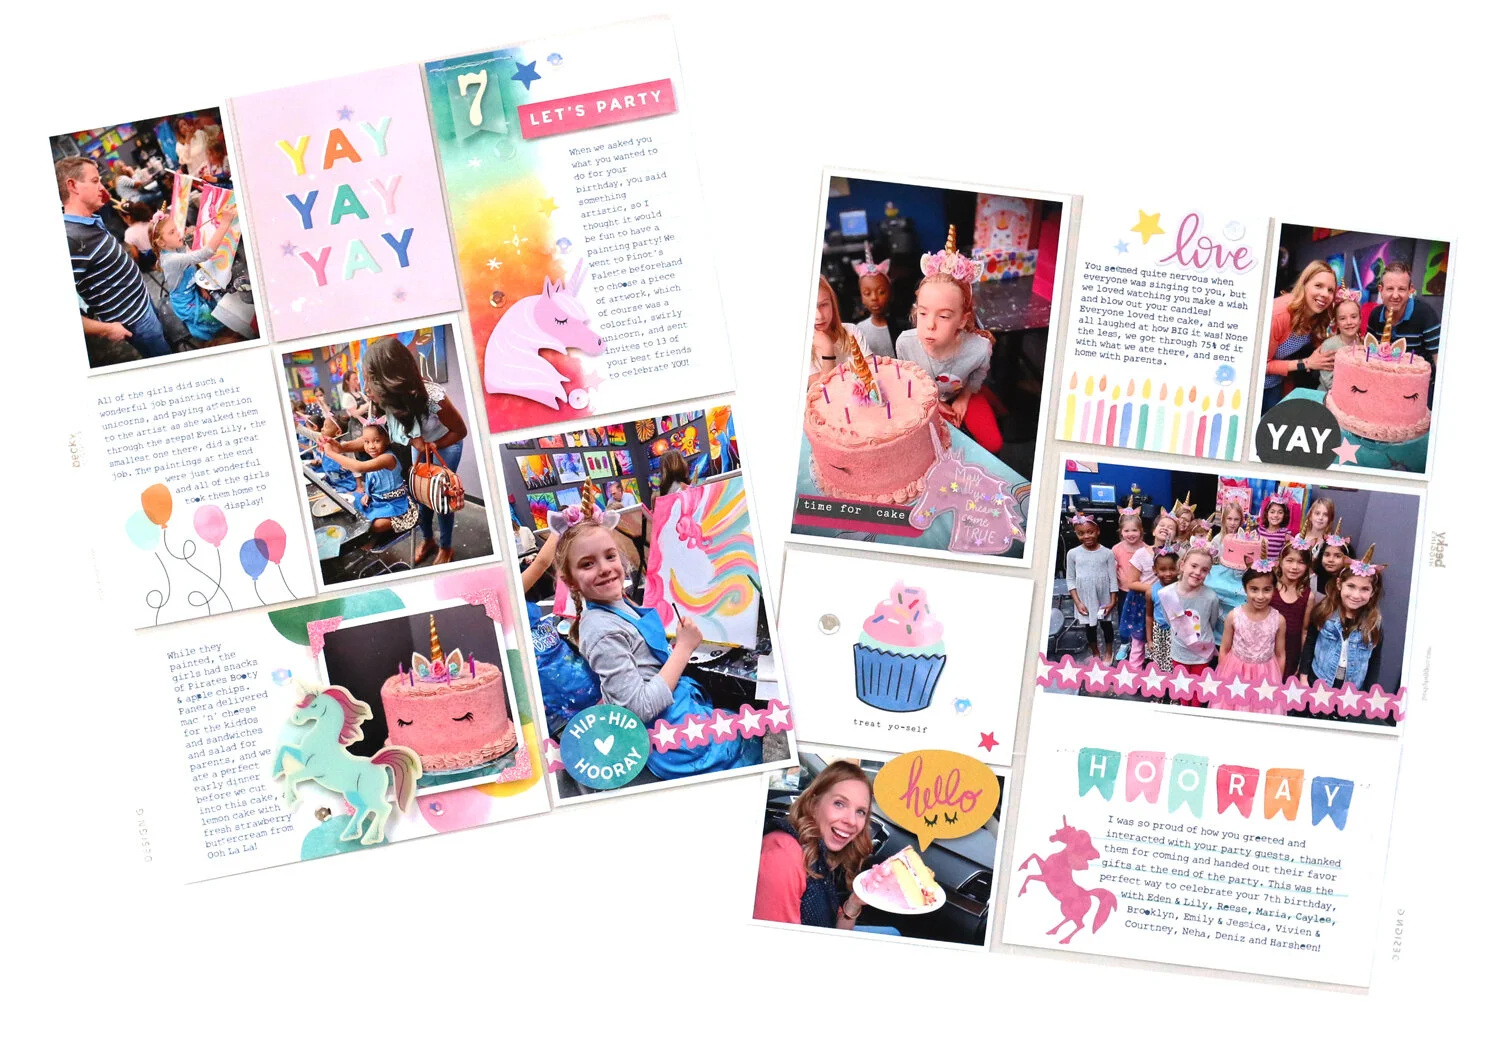
I recently received the beautiful Celebrate Today collection from Close to My Heart*, and when I saw the gorgeous colors in their Picture My Life cards, I knew I had to use them to document my daughter’s 7th birthday party, and add a few magical elements from Shimelle’s Glitter Girl collection! The combination of the old and new from my stash worked perfectly together. Take a look:

CTMH-Meghann-Andrew-Close-to-My-Heart-Celebrate-Today-Collection-Birthday-Pockets-03.jpg

All of the colors! The gorgeous Picture My Life cards provided the perfect mix of colors to stand up against my colorful photos from my daughter’s painting birthday party. I absolutely loved the colorful, watercolored elements on the cards, and used them to fill pockets and back smaller photos to record the day.

CTMH-Meghann-Andrew-Close-to-My-Heart-Celebrate-Today-Collection-Birthday-Pockets-01.jpg

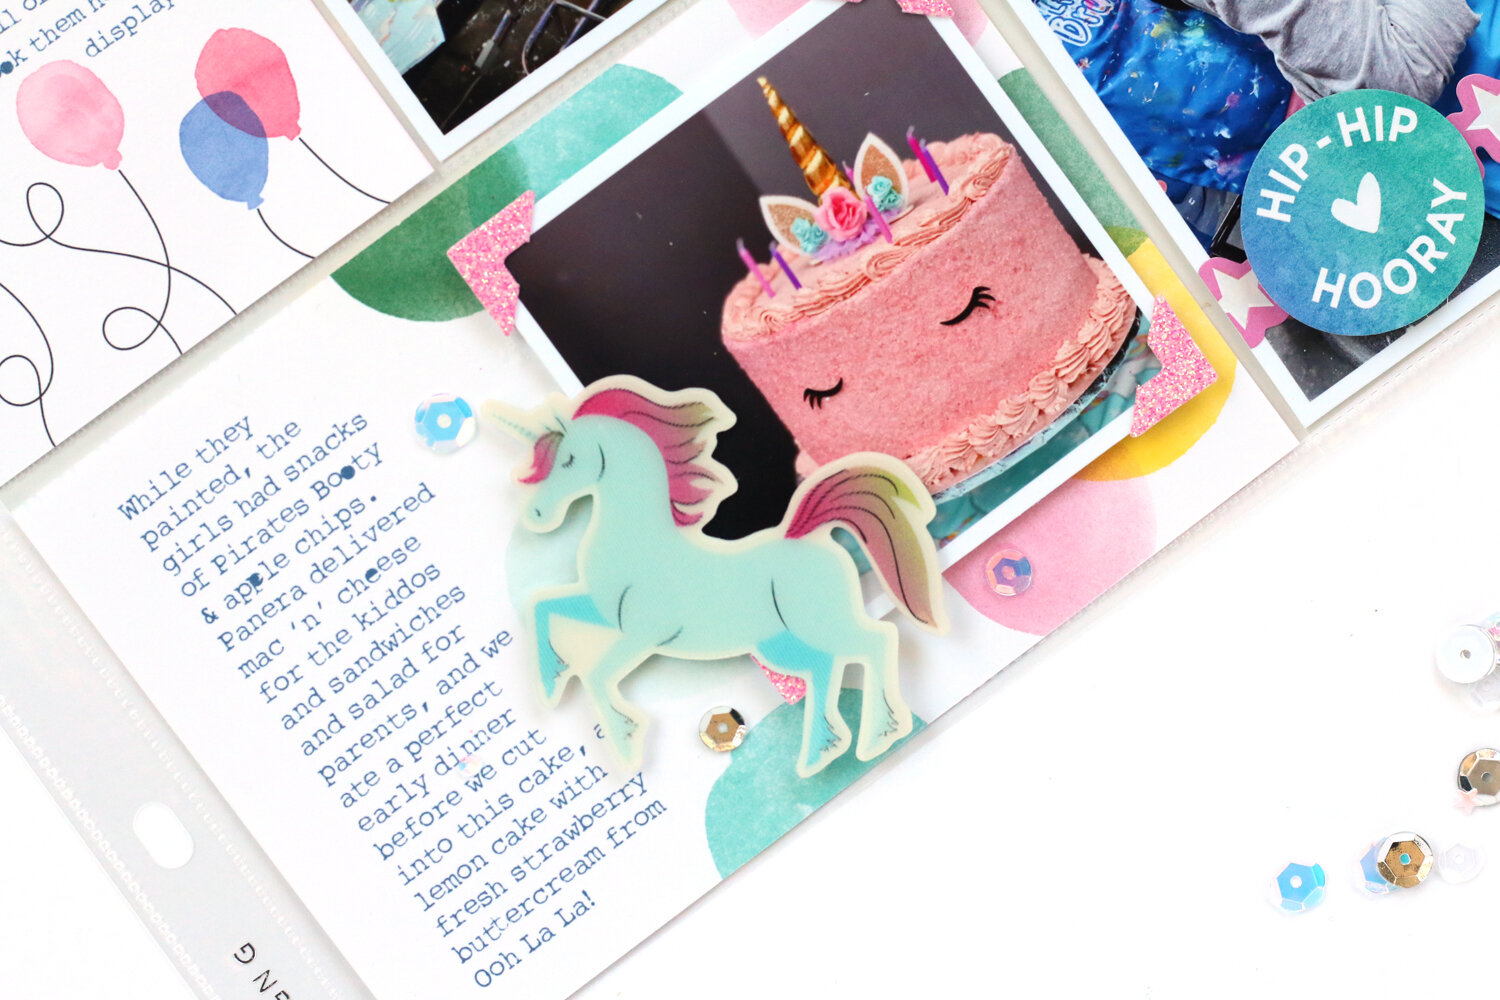
Because of all of that gorgeous color, not much embellishment was needed! I simply added coordinating stickers from the Celebrate Today collection and die cuts and stickers from the Glitter Girl collection, to add the magical unicorns, border stickers and script words.

CTMH-Meghann-Andrew-Close-to-My-Heart-Celebrate-Today-Collection-Birthday-Pockets-02.jpg

Just a few colorful stars from the Celebrate Today stickers sheet and pretty silver sequins were the only small embellishments I needed to complete my pages!

Watch how this pocket page layout came together in this quick process video:

I am so pleased that I had the Glitter Girl collection still on hand to use alongside the Celebrate Today Picture My Life cards from Close to My Heart. I hope this pocket page encourages you to mix your new stash with older product to create beautiful things! Thanks so much for stopping by today, and happy creating!

CTMH-Meghann-Andrew-Close-to-My-Heart-Celebrate-Today-Collection-Birthday-Pockets-07.jpg

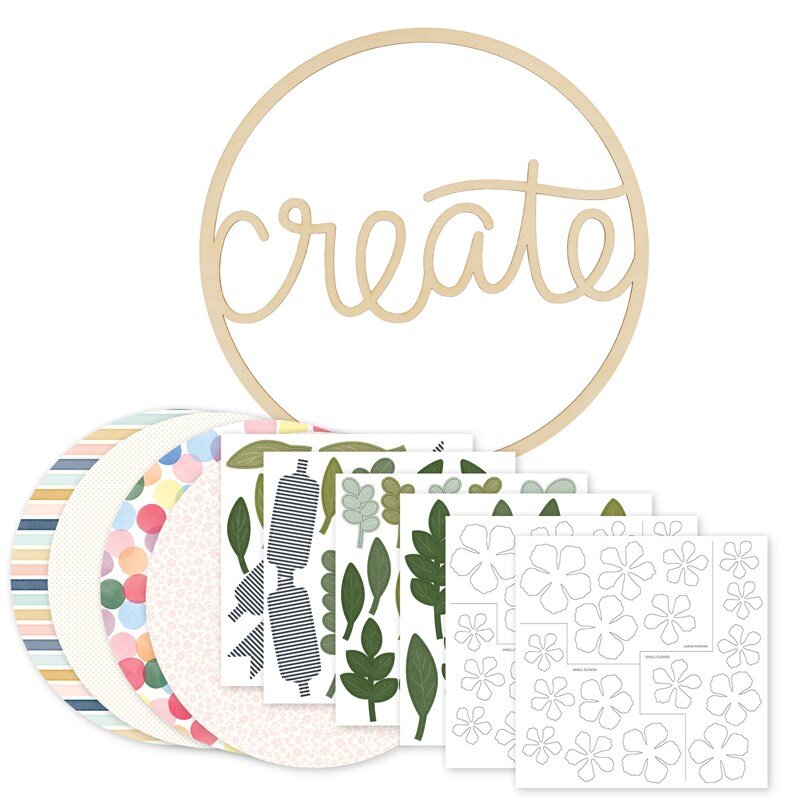
Close to My Heart All Around Creativity Create Wreath

Hello, friends! It isn’t often that I find the time to create a decor piece for my home. Because I create and do a lot of behind-the-scenes work for a living, I typically run out of time when it comes to the fun stuff that is created just for me! Recently, my friends at Close to My Heart sent me a new box of goodies, which included their two latest collections, along with a new and fun kit, the All Around Creativity Wreath Kit!

I was pretty darn excited, since my friends at CTMH are notorious for making paper crafting a simple process. This weekend, I was determined to carve out some time to create my wreath… and it only took 30 minutes! I filmed a process video while creating, so that you can see just how simple and easy it was to create and get up on my wall in one crafty session! Grab a cuppa and take a look:

I am so excited that I have another pop of contrast and color on the wall where I work on a daily basis, and I am so glad that I took the time to create my wreath. I know that you’ll love this project as much as I did, but the All Around Creativity Wreath Kit is only available for a limited period of time! Be sure to head to the Close to My Heart shop to grab yours while supplies last! The only question is, which wreath will you choose?

Close to My Heart Craft with Heart Kit: Be Merry

MeghannAndrew_CTMH_BeMerry_Double_02.jpg

I’m so excited to share my final layout of the year using the Close to My Heart Craft with Heart kit subscription! The December layouts did not disappoint with their festive colors and embellishments, and I created this 24” x 12” double-page layout about the things that make me merry at Christmas!

MeghannAndrew_CTMH_BeMerry_Double_01.jpg

Supplies | Craft with Heart December Kit, Living My Best Life stamp, 'Tis the Season Compliments, Fern-stitched ribbon, white pearls

By starting with the kit elements, and adding small amounts of coordinating Close to My Heart product, I was able to create a truly customized layout design that fit perfectly with the photos and story that I wanted to share.

Whether you follow the instructions to a “t” or do your own thing with the specially coordinated kit, I know you’ll love what you create! Check out the process video that I filmed while making this layout. In it, you’ll see how I used different-sized photos than the layout example, added a bit more embellishment using the beautiful 'Tis the Season CTMH products and stamped words that fit with my layout with the wonderful CTMH Boutique Scrapbooking Day-to-Day stamp. I also create pockets underneath my photos to add hidden journaling, a technique I use often.

Check out these wonderful and simple-to-create Close to My Heart Craft with Heart Kits today, to make quick and beautiful layouts that document your most special memories! Thanks for stopping by, and happy creating!

Close to My Heart Craft with Heart November Kit: Holly Jolly Snow Days

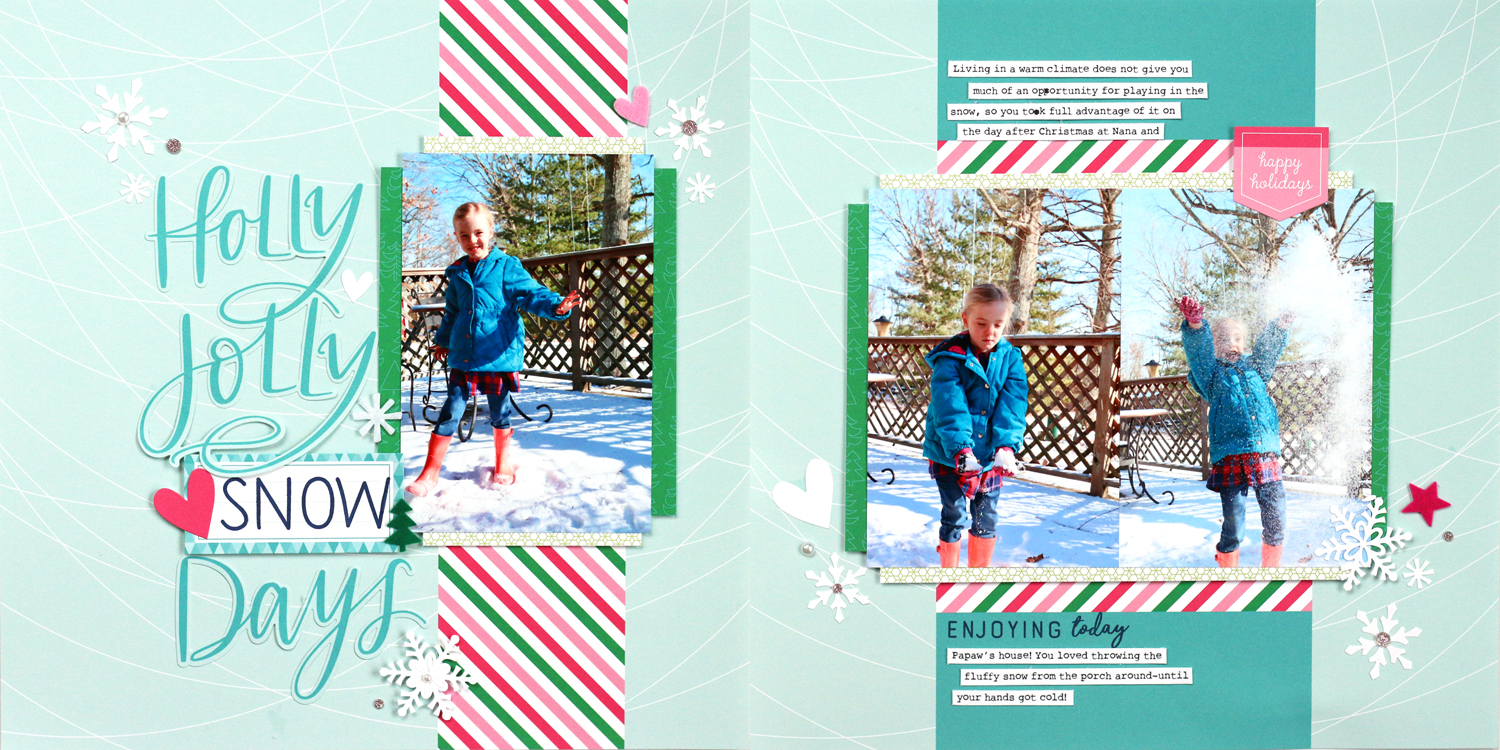
Living in Texas, we hardly ever get to experience snow, which I hate for my daughter. I always enjoyed the changing of the seasons, and the first snowfall of the year was always a magical day for me. On Boxing Day 2017, we woke to a beautiful, fresh morning of a few inches of snow, and I bundled my girl up and pushed her out the door to enjoy it. Today I’m documenting her excitement playing in the snow using the Close to My Heart Craft with Heart November Kit!

MeghannAndrew_CTMH_HollyJollySnowDays_01.jpg

This kit could not have been more perfect to for these photos. The colors and the subject of what I needed to document seemed to be made for this layout! Once I had my photos placed, I tweaked the title a bit by adding the playful Erin’s Hand Alphabet Stamp to what would have been the journaling tag, to add the word “snow.” I love how it adds to the page, and that pink heart on top of the tag gave such a bright pop of color to the title!

MeghannAndrew_CTMH_HollyJollySnowDays_04.jpg

I also loved adding some coordinating embellishments to this spread, like the gorgeous Oh What Fun felt shapes for added texture, the white pearls to bring that snowy pearlescence and the Sugarplum glitter gems for a bit of sparkle!

MeghannAndrew_CTMH_HollyJollySnowDays_06.jpg

I stamped the “enjoying today” sentiment from the Boutique Scrapbooking: Day-to-Day set and added my journaling above and below my photos, with printed cardstock strips.

MeghannAndrew_CTMH_HollyJollySnowDays_07.jpg

Check out how this layout came together quickly and easily in such a beautiful way, in the process video I’m sharing on my YouTube feed:

Be sure to subscribe to my YouTube feed (you can find a link in the right sidebar >>> ) to see what I create with next month’s Craft with Heart kit! Until then, happy creating!

Close to my Heart's Craft with Heart October Kit: This is Us

Hello! As a Close to my Heart Craft with Heart Ambassador, I receive a lovely Craft with Heart kit to create with each month, and I get to add my own spin on the kit contents with beautiful embellishments from CTMH. Today, I’m sharing what I created using the September Craft with Heart kit with you, and I could not love the result any more!

CTMH_MeghannAndrew_ThisIsUs_01.jpg

This double-page layout came together so easily! I LOVE that the background paper appears to be layered with strips of navy and teal patterned paper, but looks are deceiving! The background paper is pre-printed that way, so you can get started quickly by placing your photos on the page and adding journaling and embellishments. Just by following the kit instructions, you can create this 12” x 24” spread in under 10 minutes. That’s amazing! But, if you want to add more embellishment, CTMH’s fantastic embellishments have you covered, too. Let me show you what details I added.

CTMH_MeghannAndrew_ThisIsUs_04.jpg

If you follow me, you know that I love stamping, and I add stamping to almost every layout I create! Once my foundation layout was done, I added this fantastic phrase from the wonderful Living My Best Life (D1814) stamp on my right layout, and lovely leaf sprigs from the same stamp set, both stamped with Pewter ink (Z2832). The Grateful Heart Complements (X7237C) also added a light floral touch, and one of my favorite embellishments, the Grateful Heart Cork Shapes (Z4229) added a different texture to the pages.

CTMH_MeghannAndrew_ThisIsUs_09.jpg

I placed my title slightly lower than the layout instructions show, and that allowed more room for me to add some beautiful stamped leaf sprigs coming out of my photo, as well as stickers and die cuts from the Grateful Heart Complements (X7237C). Underneath my title, I added the word “today” from the Boutique Scrapbooking: Day-to-Day set (D1793) before adding my title.

CTMH_MeghannAndrew_ThisIsUs_08.jpg

I couldn’t forget to add a bit of shine to the page, and the Gold Loose Sequins (Z4235) placed around the spread added just the perfect touch.

Do you want to see how easily this spread came together? Watch this short process video to see fast I created the original spread, then added my own signature style to it with extra embellishment. I’ll be giving you a few tips along the way, too!

Be sure to check out the Close to my Heart Craft with Heart subscription options to document your memories in a beautiful, but easy way, and search for a consultant near you to get your own copy of the Holiday Expressions Idea Book and learn more about what Close to my Heart has to offer! Thanks so much for stopping by today, and happy creating!
Close to My Heart Craft With Heart September Kit Layout + Process Video

MeghannAndrew_CTMH_SeptKit_LovingTogether_04.jpg

Hello there! Recently my friends at Close to My Heart contacted me about their Craft with Heart kit, and asked if I wanted to give it a try. I'm all about kits that help me get my memories documented quickly, and after I saw the kit images, I was all for it! These kits are beautifully designed, and include the paper, stickers and die-cuts that you'll need, as well as instructions for how to complete two 24" x 12" layouts in each kit. All you need to do is add photos and your journaling. These kits also coordinate beautifully with their gorgeous paper collections included in the new Holiday Expressions Idea Book. There are also three different subscription options, so be sure to check out all of the details on the Craft with Heart website.

MeghannAndrew_CTMH_SeptKit_LovingTogether_05.jpg

I started out with the September kit, and decided to document a special family wedding, because the colors in the kit were perfect for all of the brightly colored clothes (and accessories!) that we were wearing for the wedding day. Sticking to the kit and instructions would have created a beautiful layout, but I wanted to take it a step further by adding more embellishment and (of course!) STAMPING! It's just what I do! I'm so happy with how my final layout turned out:

MeghannAndrew_CTMH_SeptKit_LovingTogether_Full.jpg

This kit was perfect for documenting a special day, using my own photos and memories! You can see what the layout would have looked like had I stuck to the kit instructions, and find out how I had to change things up a bit to reflect the photos that I had on hand, in this process video:

Be sure to check out the Craft with Heart kit subscription options, and stay tuned for another layout next month, using the beautiful October kit! 

MeghannAndrew_CTMH_SeptKit_LovingTogether_07.jpg

Note: I was asked to be a Craft with Heart Ambassador by Close to my Heart, and I chose to do that because their kits are lovely, and I think that they will be great for you, my blog readers and video followers. I would only recommend product that I myself would use and enjoy. I hope you enjoy it, too!