Pinspired!

Happy Monday! Today I'm up on the Scraptastic blog with a new layout, created with a fantastic pin. 

Designer Leah Greenberg via Print & Pattern

Designer Leah Greenberg via Print & Pattern

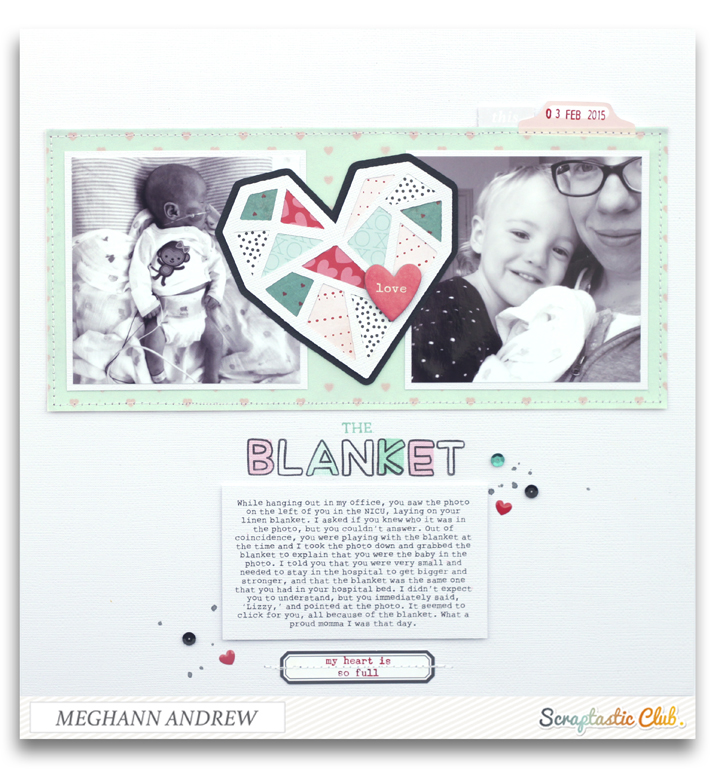
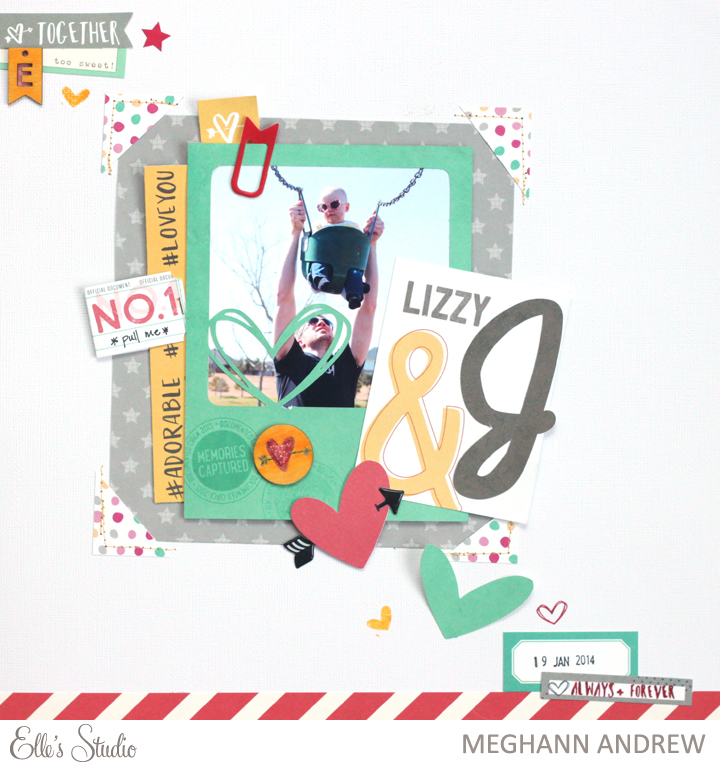
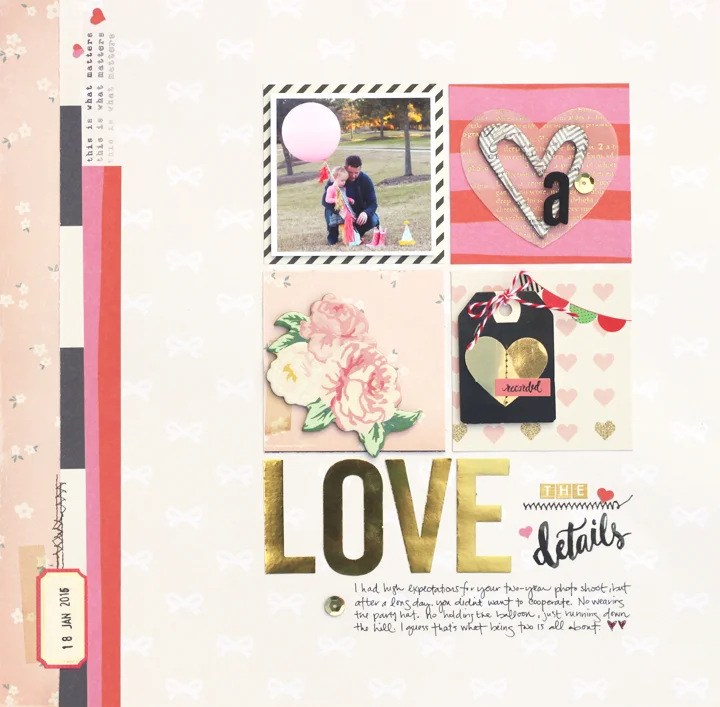
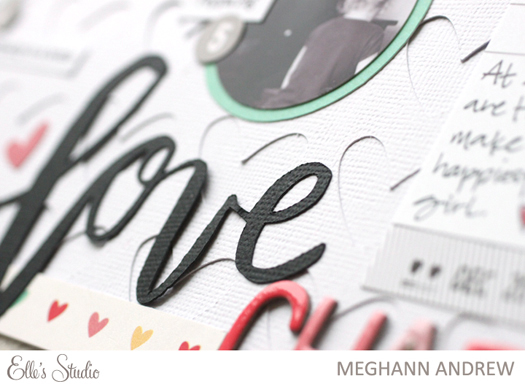
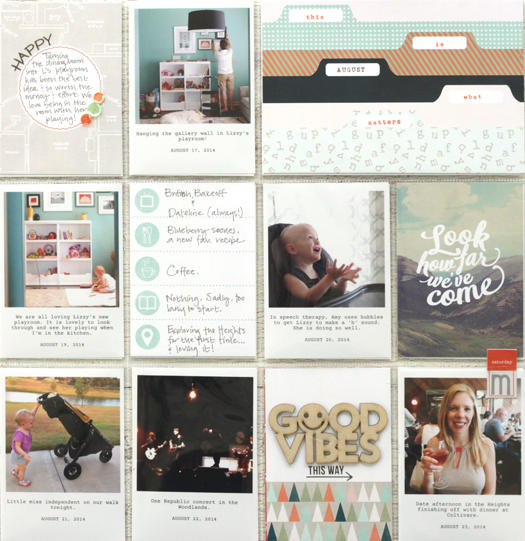
I loved the design on the left with imperfect circles, so I created this layout with one of my favorite photos from when Lizzy was little.

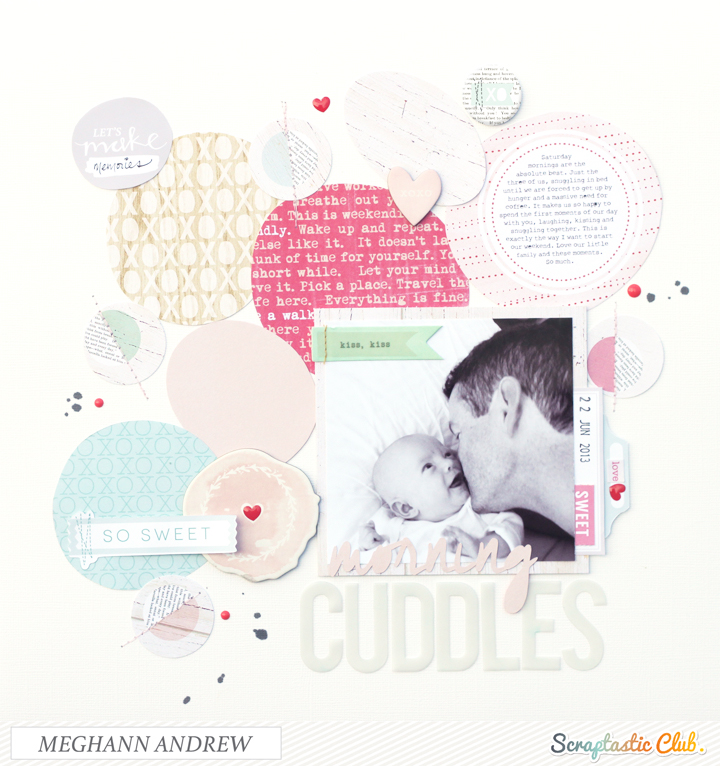
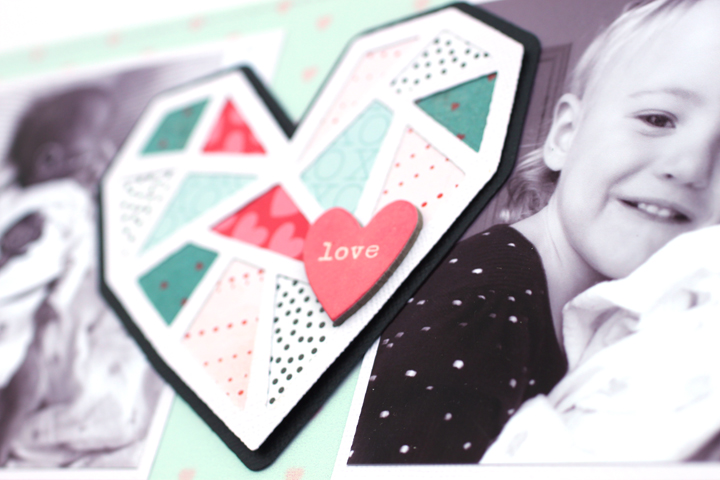
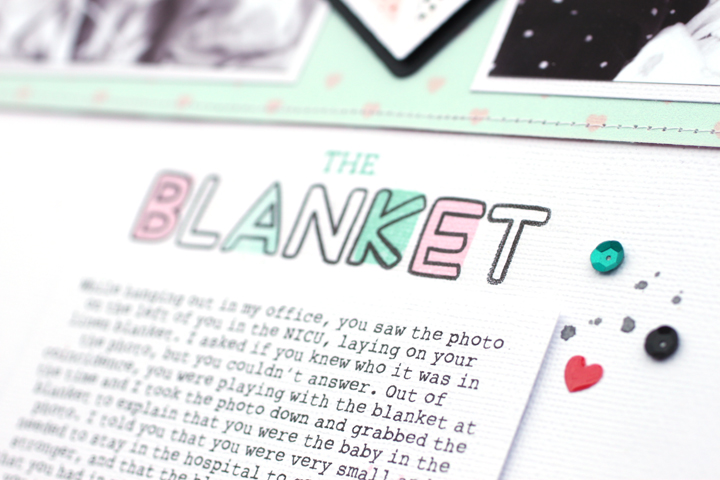
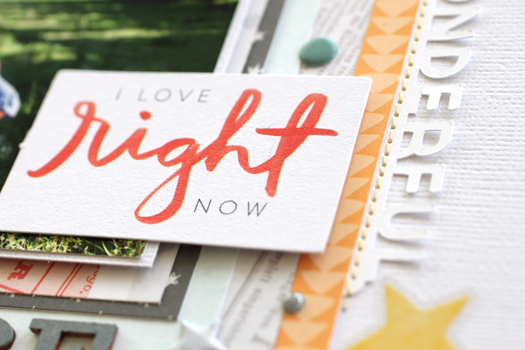
I created the layout with the February It Takes Two kit & add-on, hand-cutting my circles for the background and adding punched circles and bits and pieces of embellishment from the kit, as well as the awesome digital files this month. 

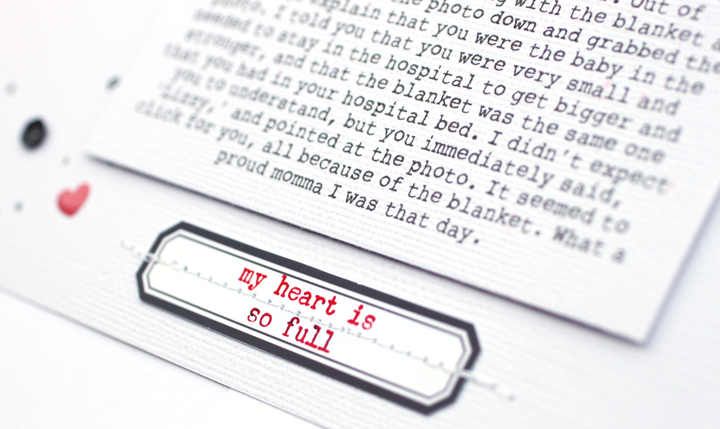
To add the typed journaling in the circular journaling tag, I drew a 2"x2" circle in Photoshop Elements and added a horizontal text box around the outside of the circle. I centered my text & kept the text inside the circle by hitting 'return' whenever I got close to the edge. After typing, I deleted the circle and printed the journaling out on a piece of paper. I then used non-permanent adhesive to adhere my journaling card over the top and ran it through the printer again. 

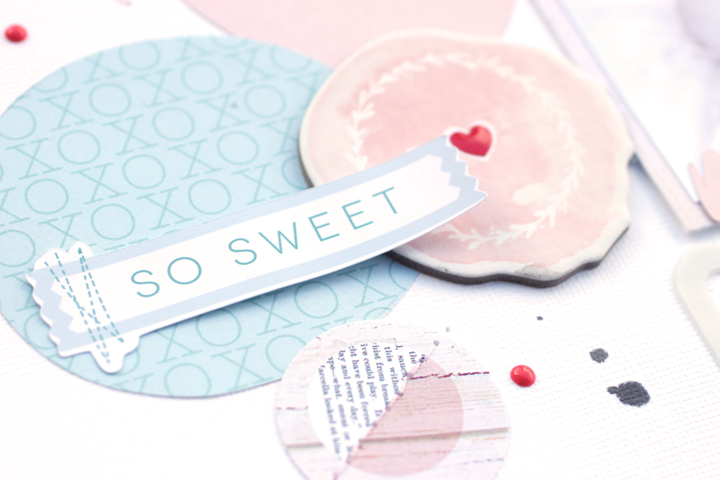
The pretty chipboard elements from Crate Paper's Kiss Kiss collection worked perfectly with the soft colors of the patterned paper in the kits & I am so pleased with how the layout came out- exactly as I envisioned it.

How have you been inspired by a Pinterest pin lately? 

What We're Eating Wednesday: Chana Masala

I am a huge fan of Indian food, and we often have 'curry nights' where a group of friends get together and order take-out on a Friday night. A few weeks ago, we decided to make our curries instead of ordering takeout & after researching some Indian dishes, I came up with this easy, vegetarian, inexpensive meal that will now be a staple in our house.

Chana Masala

adapted from this recipe. Serves 4

  • 2 Tbsp. vegetable oil
  • 1 tsp. cumin seeds
  • 1 medium yellow onion, diced small
  • 4 tsp. peeled, finely chopped fresh ginger
  • 4 medium garlic cloves, finely chopped
  • 1/2-1 serrano chile, de-seeded, de-ribbed and chopped (for mild heat level)
  • 1 (28 oz.) can whole, peeled tomatoes
  • 2 tsp. garam masala
  • 1 tsp. ground coriander
  • 1 tsp. kosher salt
  • 1/2 tsp. tumeric
  • 2 (15 oz.) cans chickpeas
  • 1/2 fresh lemon
  • 1/4 c. heavy cream
  • Fresh cilantro leaves

1. Heat the oil in a large skillet over medium heat. Add cumin seeds and cook until fragrant, about 1 minute. Add onion, ginger, garlic and chiles and season with a pinch of kosher salt. Cook about 6 minutes, stirring frequently.

2. Reserve the juice from the can of tomatoes and set aside. Chop up tomatoes into 1 inch pieces. Set aside.

3. Add garam masala, coriander, 1 tsp. salt, and turmeric to the pan and stir to coat the onion mixture. Cook until fragrant, about 1 minute.

4. Add the chopped tomatoes, the tomato juice, 1 can of chickpeas with their juice and one can of chickpeas, drained and rinsed. Stir to combine. Reduce heat to medium-low and simmer, partially covered for 1 hour.

5. Just before serving, add juice from 1/2 lemon and heavy cream. Serve over basmati rice and garnish with fresh cilantro leaves.

The Blanket

I shared this story a few weeks ago on my Instagram profile, so if you follow me there, you'll probably have a bit of déjà vu reading this post. 

Lizzy and I were in my office, where I have multiple photos hanging up from our time in the NICU. She's at the stage where she loves to point out loved ones in photos and we were looking at multiple pictures hanging up and naming Daddy, Papaw, Nana, etc. When she came to this photo, she couldn't name the baby in the picture.

Dated April 15th, 2013. 37 weeks adjusted gestational age. Almost 3 months old actual.

Dated April 15th, 2013. 37 weeks adjusted gestational age. Almost 3 months old actual.

The blanket that she was laying on in the photo just so happened to be in my office where she was playing, so I grabbed it and showed it to her, pointing out that it was the same blanket as the baby in the photo was laying on. Then I explained that the baby was her, when she was very little and needed to get bigger and stronger in the hospital. She hugged the blanket and pointed to the photo, saying, 'Lizzy,' (or 'Liddy', as she calls herself). It was definitely one of those wow moments for me as a mother. I had to take a photo of the two of us after that to remember the moment. 

As a documenter, these are the stories that I want to get down on paper so that, years from now, I can turn to this page in my album and say, "Yes, that was an amazing moment." So, I decided to create a very clean layout which focused on this story. 

Supplies: Scraptastic Club 'It Takes Two' kit & add-on, Scraptastic Club 'Counting Stars' stamp set, 'Counting Stars' digital files, 'It Takes Two' stamp set, 'It Takes Two' labels, 'It Takes Two' digital files, vellum, sewing machine, Stampin' Up! ink, Shimelle date stamp, black mist spray, 'Rough Typewriter' font

To keep the patterned paper behind my photos from attracting too much attention, I covered it with a sheet of shimmery vellum, which gives the layout a very pretty appearance. I absolutely love the heart digital cut file from the 'It Takes Two' digital files and used it to separate my two photos- sort of a 'then' and 'now' juxtaposition of images- and glued small pieces of patterned paper to the holes at the back of the cut. To make that stand out a bit more and give more weight to my photos backed the heart with a black cardstock, slightly larger than the original cut file. 

The 'Counting Stars' alpha stamps have to be one of my favorite things from this month's offerings. Designed by the talented Kaitlin Sheaffer, they are the perfect font for this subject, and I love that you can put colored blocks on top of the letters, or color them in yourself with watercolor or pens. So fun. 

I've also been typing out my journaling a lot in the last few weeks- not because I have a problem with my writing, but simply because I can fit more words in a small space with a typewriter font as opposed to my handwriting.

To finish off the page, I added a black label (check out Kaitlin's free label downloads!) and stamped 'my heart is so full,'- a perfect phrase for this story- with the 'It Takes Two' stamp set.

I am so happy to have this moment on paper. What stories do you need to document today?

Easy Handmade Valentine's- At The Last Minute!

If you're a bit behind on creating a special gift to give a loved one from your child on Valentine's Day tomorrow, I have a great, easy idea for you. 

After finding this handprint flower pin on Pinterest, I decided that it would be a perfect gift to send to family for Valentine's Day, however, I knew that I only had one shot at getting my daughter to sit still long enough to make a painting. So, after nap time on Tuesday, I smocked Lizzy up and pulled out some Crayola washable kid's paint that I purchased at Michaels, as well as a sheet of watercolor paper (you can use a regular heavier weight paper, but it tends to buckle more than watercolor paper.)

This was our second attempt, which turned out quite well. I didn't really expect Lizzy to hate finger paint, so I was lucky to get something that resembles a flower! 

After the image was dry, I put it on my scanner and scanned it in at 300dpi (I had to weigh the page down quite a bit to get it to lay flat on the glass.) I opened the JPG file in Photoshop Elements, touched up some of the smudges & changed the background to a true white for printing. After that was complete, I wanted to add a little 'note' from Lizzy, so I turned to the Elle's Studio January digital cut file. I pulled out the PNG files for the 'love' word and the hearts, recolored them and added them around the flower. 

Once the PNG files were in place, I just added a bit of text to finish off the print. 

I printed the image out onto high resolution matte paper, trimmed the edges and popped them into an 8x10" frame to send as gifts. 

Today when I needed last minute Valentine's Day cards, I just resized the image to 4-1/4 x 5-1/2", printed, and popped them into an envelope! Plus, I have the original that I can frame for my office wall. 

Happy Valentine's Day and happy creating!

Elle's Studio February Kit Reveal

I'm excited to tell you that the Elle's Studio February exclusive kit is now live! I loved this month's kit and there are endless creative possibilities with it! 

I fell in love with the red, teal and yellow colors in the kit, with my favorite being the yellow ampersand card above. I used it to created the title on my layout. 

I used the kit, as well as this month's 'Always & Forever' stamp set (Elle's stamps are SO fantastic!) and 'Key to my Heart' wood veneer

I also created with the lovely digital files- the cut file and printables

My second project, a series of three Valentines Day cards, is a great example of how you can use kit contents to make your handmade greetings- simply or not-so-simply! 

For full details on the products I've used for all of my projects, please see the Elle's Studio design team gallery.  

Also, don't miss the Elle's Studio sale! I LOVE ES stamps- the quality and the designs- and you'll want to take advantage of these savings! 


Jot Magazine February Mood Board

Sometimes when I need help starting a layout, a mood board is just the thing I need to get my creative juices flowing. The mood boards on the Jot Magazine blog are always so beautiful, I can't look at them without envisioning a layout. This month's board is no exception!

smallFEBRUARYMOODBOARD.jpg

I was especially inspired by the color scheme, the square shapes of the cookies & pillows, as well as the bold, graphic font. Here's what I created.

Love the Details blog.jpg

'Love the Details' Supplies | Cardstock: American Crafts | Patterned paper: Crate Paper (black & white stripes, light pink floral, bows, vellum), American Crafts (hearts), Gossamer Blue (red & pink stripe) | Embellishments: Crate Paper (label & 'recorded' sticker, rub-ons, floral chipboard, tag), Pebbles (large gold letters), American Crafts (date stamp, black chipboard 'a'), Webster's Pages (small letter stickers), Heidi Swapp (chipboard heart) | Stamps: Scraptastic Club | Tools: Stampin' Up! (heart confetti punch) | Other: Ink & markers (Stampin' Up!), sequins, twine

Be sure to check out the amazing projects from the other Jot Girls over at the Jot blog and link up your own creation for a chance to win a prize!

Also, if you'd like to have your work featured in the upcoming Issue 9 of Jot Magazine, submit your projects today based on the submission themes. All details can be found in the link.

Thanks for stopping by and happy Monday! 

Friday: I'm In Love

Happy Friday! Here are a few things I'm loving this month.

FridayLove2_6.jpg

1. We purchased the Land of Nod Little House Executive Nod Chair for Lizzy before Christmas to give to her for her birthday. I love that the cover is machine washable and that it's multicolored, so can go with any decor. Plus, it's ultra sturdy and easy to re-assemble. She loves to sit in it while I read to her, and it's definitely large enough that it will be in use for a few years.

2. I was looking for a pair of stylish, flat booties to take to CHA and just happened to come across these Kate Space Prospect booties in my Last Call by Neiman Marcus. I had a coupon, so I took a chance and got them for $130, over half off the retail price. They are the most comfortable, most amazing boot I have ever purchased. I wore them for almost 12 hours straight during CHA and my feet didn't hurt a bit, which is amazing, since I have the worst feet ever. They're hard to find online right now, but if you have a Last Call or a Nordstrom Rack, it's worth searching for these babies.

3. Another outlet purchase I made when buying the booties was this Erin leather small top zip crossbody by Fossil. I picked it up at the Fossil outlet for only $50, half off the retail price. I love that it includes an organizer for my cash and cards right in the purse, with plenty of room for a compact, brush & lip gloss. Plus, the front pockets are fantastic for a cell phone or business cards. Plus, the pebbled leather matches my new booties. Score.

4. Last year, our company insurance policy gave us both a Fitbit Zip to keep track of our steps as a health incentive. This year, the company decided to upgrade our Fitbit options, so we both chose the Fitbit Charge HR. As much as I didn't want a wrist monitor, after wearing it for over a month now, I actually don't mind it at all, and after comparing the heart rate readings to my chest-strap heart rate monitor, it's surprisingly accurate! After losing two Zips last year, I'm sure that this one will be much easier to keep track of on my wrist.

5. After recently ordering the Young Living premium starter kit & finding a helpful community on Facebook, I tested my Theives oil this week when I started feeling like a cold was coming on. I diffused the oil, drank a drop in my orange tea several times & rubbed it on my neck before bed. After a day of doing this, I was feeling 100% better. I'm pretty much convinced that this stuff works.

Scraptastic January Projects

Last month I received the Scraptastic Kit Club's 'This Must Be the Place' kit and add-on, as well as the This Life Noted kit (sold out). I love what I created with the kits & I want to share them with you today.

'The Story of Us' was created as my Project Life 2014 title page. All of the details about this layout can be found at the post below.

Batada blog.jpg

'Ba-Ta-Da' was created using the January sketchy Thursday challenge and records my daughter's love of butterflies, which she calls, 'ba-ta-das.'

I shared all of the information about this month's This Life Noted spreads on the Scraptastic blog, as well as a peek into my process for creating monthly Project Life spreads. If you're interested in using the Collect App for documenting, or are looking to switch from weekly to monthly layouts, check out this TLN Friday post

Finally, I made a few cards with pieces from the kits, and the awesome Sentiments Series Volume 4 stamp set, which I loved since it has SO many different phrases included! On this card, I stamped 'hello' repeatedly on the heart, as well as 'thinking of you' on the teal tag.

This card uses the 'Whoa!' This Life Noted 3"x4" card for part of the sentiment, but I also stamped 'Congratulations' and 'You Did It!' on the blank tag included in the kit. I used the gold vellum leaves die-cut to mimic the tail of a shooting star, which I created with the starburst sticker, a stamped star circle and a few sequins.

Some of the pieces from the kit were just too perfect for me not to get a jump on my Valentine's Day cards. For this one, I used the banners from the Teresa Collins die-cut pack, the exclusive wood veneer from Scraptastic, a Maggie Holmes vellum heart and 'I Treasure You' sentiment, and the Jillibean Soup cork 'love' sticker. 

The February kits from Scraptastic are now live and I am so excited to create with the 'It Takes Two' kit and add-on this month.

Be sure to check out all of the Scraptastic Kit Club's beautiful kits and stamp sets before they're gone! 

Hello & welcome to my new blog!

For so long I have hated the design of my old blog, Meghann's Little Corner, but I didn't have the time to change it. I even purchased an online course on building a blog with HTML code, hoping that one day I would find the time to create a new site. Then, I found Squarespace, which opened my eyes to an easier way of getting the job accomplished! I highly recommend Squarespace to anyone who is in the same boat. I started the process literally 5 days ago with minimal effort. 

You may wonder how I came up with the title, "Brioche and Blessings."  Brioche is a bit of a personal joke between my husband and I, but in this case, the word 'brioche' literally translates to, 'all of the real life stuff,' and blessings are, well, just that. 

So, what can you expect to see here? If you were a reader before, you know that this is a scrapbooking and paper crafting blog. This won't change, however, I'd like to post more about our family life and photos, since I know that some people who visit my blog are not interested in scrapbooking. I also want to get back into posting food on a regular basis as well, as food is my second passion in life. Plus, it's much easier to photograph than a very quick toddler.

I'm hoping that this new, exciting (well, it is for me anyway!) design will give me motivation to be here more frequently. Please, please leave comments whenever you have a minute. And if you're just a lurker (Yes, you. I know you're out there.), feel free to lurk away.


2014 Project Life Title Page

As I'm about to wrap up my 2014 Project Life album, I've realized that I have not created a title page. Before I show you my layout, can I please just say how awesome it is to find my groove in my PL album & to be so close to completion on such a huge project? 

When I started my album last year, I started with my January spreads, not a title page. As the year went on, I decided that the title page should be an overview of photos from the entire year, not something that I created before any of our memories were documented.

When I saw the January 'This Must Be The Place' background cut file from Scraptastic, I realized that this would be the perfect background to create my title page, filling the spaces with a photo from each month of the year as well as pretty paper from the January Scraptastic Club kit.

I first decided where I wanted to put my title and before I had anything glued down, I adhered my title so that I kept those spaces open. I used a mixture of the Dear Lizzy Thickers from the kit, the wood veneer 'us' (cut from the 'all of us' wood veneer piece in the kit) which I colored with black acrylic paint and the Jillibean Soup stickers.

After the title was in place, I marked the 12 squares in which I wanted to put photos. In Photoshop Elements, I resized my photos to 1-5/8"H x 2"W and changed some of the photos to black and white if the colors in the photo didn't work with my layout. After printing the photos and cutting them out, I slid them behind my background cut file and decided which papers from the kit and add-on to use. This month was the first month that Scraptastic Club had exclusive designs in the kits, and I loved all of them! I cut them to the same size as my photos and hand-cut the ones on the edges at an angle.

Once I had all of the papers and photos in place behind my background, I adhered everything to the white cardstock background, first my paper and photos, making sure that they were straight behind the background cut file, then adhered my grey cut file. 

After all of the paper was in adhered, I added a few small embellishments from the 'This Must Be The Place' print and cut file, the kit, add-on and a few enamel dots from the January This Life Noted kit. To me, this layout is much more about the photos, so I kept my embellishment simple. 

I'm two months away from finishing my album, and this layout is the perfect overview for our memories in 2014!

Thanks for stopping by and be sure to check out the NEW,

beautiful Scraptastic Club website

A NEW Shimelle giveaway winner!

Hello there! I'm just back from CHA this week and getting back into the swing of things around here. After trying to communicate with my Shimelle glitter album giveaway winner, I've received no reply, so that means I get to choose another winner!


If you are Scrappiegirl, click on the 'email me' button on my sidebar to claim your prize! 

Elle's Studio January Reveal!

It's the 10th, and that means that it's time for a new Elle's Studio exclusive kit and add-on! As I say every month, this kit is beautiful and versatile to use on so many different projects. If you haven't checked them out yet, the price is reduced to $9.99 for the 10th ONLY. After midnight PST, the price will go up to $11.99, so take advantage of the savings and grab this lovely kit.

Since I am on the design team again, I will be creating two projects with the kit every month and sharing them here and at the design team gallery, which you'll want to check out for tons of inspiration! I started with a layout, and was so inspired by the pie-chart heart tag that I centered my entire layout around it, hand-stitching the lines to my photos. 

Supplies: January exclusive kit12"x12" heart cut file, January cut file,  'A Bushel & A Peck' stamp, 'Lots of Love' wood veneers'Love You More' paper collection'Hello 2015' stamp'Hello 2015' stickers

The heart background cut file is perfect for getting the tone-on-tone texture that I thought this layout needed to make the rest of the elements shine. The 'love' cut from the January cut file was perfect for my title, and the font is so on-trend! 

I also used the 'Bushel and a Peck' stamp to stamp 'You Love' on my journaling tag. 

Next, I created a BIG 6"x6" card based around the large 'thank you' tag in the kit. 

Supplies: January exclusive kit'A Bushel & A Peck' stamp'Lots of Love' wood veneers'Love You More' paper collection'Hello 2015' stickers

I used the stamp on the 'Bushel and a Peck' stamp set to stamp the background, stamping off on some of the hearts so that they were lighter than the others. A few other tags from the kit, a sheer ribbon, along with the wood veneer heart, embossed with gold embossing powder, finished the card off.

Thanks for stopping by to check out the new exclusive kit & be sure to take advantage of the reveal day savings! For more inspiration using the kit, check out the new 2015 design team gallery

Scraptastic Club Layout: Cambridge

Every once in a while I print out a stack of photos and I have one that just sits around waiting for the perfect supplies to scrap it. In 2012, on a trip back to the UK to visit family, we met our good friends who had just moved to Lakenheath with the U.S. Air Force. We wanted to introduce them to some of our favorite things about the U.K., so we went to Cambridge and spent a lovely day exploring the city. We had a Marks & Spencer picnic in the park (my favorite way to spend a nice, sunny, British day!), browsed shops, walked on cobbled streets and visited a National Trust garden nearby.

When I picked up the December Heartbeats kit (sold out) and add-on (still available!) from Scraptastic, I knew I had to finally use this photo taken in front of Cambridge University.

This is my favorite part about this layout- the 'hello adventure' banner at the top and arrows, created with bits of paper sewn to the page, Amy Tangerine Stitched die-cuts and stickers, radiating downward towards the photo.

I also added a camera die-cut from the Amy Tangerine Stitched collection on the negative space in my photo, topped with a puffy heart from Evalicious.

Again on the right side of my photo, I added a die-cut tag, and stitched the 'wonderful' cut along the right side of my patterned paper. The title, created with the wood veneer letters found in the Heartbeats add-on (still available!) was colored with grey acrylic paint before adding to the layout.

Do you have photos waiting around for the perfect supplies?

Project Life Update: September

It is so exciting that I am almost complete with my 2014 Project Life album. I already love flipping through the pages and remembering special moments from our months. Since August, I have been using the This Life Noted kit from Scraptastic Kit Club (whom I design for) and it has made my process so much easier, and so fun! Today I'd like to share my September spreads with you, created using the December This Life Noted kit.


Unfortunately this kit is currently sold out, and the Scraptastic TLN kits are very popular each month, so I would highly suggest you start a subscription or pick one up on the 1st of the month if you're interested! The cards are a lovely, smooth heavy weight and the kit always comes with some great alphas, a fantastic stamp set and embellishments! (Click on the link above to see the full listing of what is included with the kit.)


The color scheme of my first spread is predominately a tomato red and minty green, with a bit of yellow thrown in for good measure. I was so drawn to the floral card on my second page that I based my color decisions around it. The large heart on my introduction card came from the December scrapbook kit, Heartbeats- the Amy Tangerine Stitched accent stickers. I also printed 'September' on my card by using Photoshop and running the card through my printer. On the 'love love love my job' card, I used the This Life Noted stamp set alpha- I loved that they were easy to color in, so I did so using a water pen and water-based markers. (Here's a tutorial showing my process for that.) 

On page two, you can see my favorite 4"x6" floral card on the top left. I topped that with a tag that I cut from another 4"x6" card, a Heidi Swapp transparent 'hello' from the TLN kit, Elle's Studio alphas from the Heartbeats kit, and a cut-apart banner. The My Mind's Eye 'moon and back' overlay in the second row is actually from the Heartbeats add-on. I love having some transparency in my album.   

On my second spread, I kept the floral pattern on the 4"x6" card, but used mostly yellow and blues on my embellished cards. The 'pumpkins are awesome' tag was created by stamping 'pumpkins' with the This Life Noted stamp set and 'are awesome' with the Heartbeats stamp set- which I LOVE

On page four, I again used a My Mind's Eye overlay on my 4"x6" card and embellished with cut-aparts, a die-cut from Amy Tangerine's Stitched collection (found in the Heartbeats add-on) and a wood veneer paperclip. On the 'BAKE' card, you can see a little black arrow that says, 'love.' Those are actually little puffy stickers by Ormolu in the Heartbeats kit and I used them often on these spreads.


I'm still plugging away at my last three months & can't wait to have 2014 'in the books'! How are you keeping up with your pocket page memory keeping?

Shimelle giveaway winner (and the reason why it's so late!)


I apologize for my delay in posting the winner for my Shimelle album giveaway, but over the holidays, my daughter was in the ICU for RSV, a respiratory virus that is especially hard on preemies, and one that she had been vaccinated for. We keep her away from public areas at this time of year to help prevent something like this from happening, but this winter has been a tough one for respiratory viruses. (P.S.A. If you're sick- coughing, sneezing- please stay home!)


It was especially hard for us as we had spent the days leading up to Christmas in the exact same way last year, with another respiratory virus that caused Lizzy to go into respiratory failure.

Luckily, we were able to get out of the hospital on Christmas Day and spend a lovely couple of days at home with my family- days that I will cherish and share very soon in my December album!


Now, on to the winner of the Shimelle album...


Kimberly, please email me at meghann[dot]andrew[at]gmail[dot]com to provide your mailing address and claim your prize!

Thank you to everyone who left a comment about my '5 Ideas Using Shimelle Dies' guest post at Shimelle's website. They were so appreciated! 


Elle's Studio DT 2015 (EDITED with a giveaway winner!)

I am very excited to announce that after being on the contributing team for Elle's Studio for the past year, I've been chosen as a design team member for 2015, along with some amazingly talented ladies whom I've looked up to for quite some time!

Jessy Christopher http://www.jcchris.com/

There are also four wonderful blog contributors who will be bringing you posts on the Elle's Studio blog throughout the month.


Waleska

I've already finished creating my gallery projects for the month of January featuring the beautiful exclusive January kit. Here's a sneak from my gallery that will go live at 10am PST on the 10th of January at the Elle's Studio shop. I can't wait to share this with you!


For some fun today, Elle has generously allowed me to choose my four favorite ES products to give away to one of the commenters on this post! 

If you win, you will receive:

Please comment on this post for a chance to win and go to the other members' blogs as well for a chance to win everyone's favorites! Winners will be chosen on January 7th and will be posted on each individual blog.

Thanks for stopping by! 

AND THE WINNER IS:
Please email me (using the button on my sidebar) with your name & shipping address so that we can get your Elle's Studio goodies out to you! 

Elle's Studio December Exclusive Kit

Today is the reveal of the Elle's Studio December kit and this month's kit is packed with so many lovely tags! I'd like to share my layout with you about our Christmas last year.


I absolutely love this layout, and it turned out exactly as I had hoped it would. When I saw the large pie circle in the kit, it reminded me of a bauble on the tree, and that gave me the inspiration for the entire layout. Let me show you the product I used.


The colors in the kit this month are just beautiful- perfect for Christmas and non-Christmas projects. 

The digital Joy printables and cut files this month are also fantastic! I used the 'magic of the season' print circle on the large bauble on my layout.


Don't forget to pick up the Christmas ephemera pack to help you finish off your December album or add a special touch to a layout or card. I love the wood veneer in this mini kit.

Along with the exclusives this month, I also used the lovely Good Cheer collection pack and Good Cheer bits & pieces along with two stamp sets:


I stamped 'merry & bright' from the Merry & Bright stamp set on the date card and repeated 'love * joy' from the Warmest Wishes stamp set above my journaling. 

Thanks for stopping by! Go by the Elle's Studio shop to pick up this month's exclusives before they are all gone. Remember the exclusive kit is on sale for $9.99 today only, from the normal $11.99 price.


Shimelle collection sneaks & a giveaway!


I'm guest posting on Shimelle.com today with 5 ideas on how to use the Shimelle collection metal dies. I'd love for you to hop on over and check out my post!

Also, the link to my watercolor tutorial video didn't get on the Shimelle post, so if you're interested in checking that out, please go here.

Once you've done that, come back here and leave a comment for a chance to win the beautiful gold glitter 12"x12" album from the Shimelle collection! (Giveaway open to U.S. residents only, please, due to shipping costs overseas.)

Scraptastic This Life Noted November

I'm happy to say that I'm caught up all the way through August in my Project Life album and using the November This Life Noted kit from Scraptastic is making me love this process and especially my August spreads so much!


For my first spread, I used a predominately red color scheme, accented with teal, yellow and green. I love the little bits and pieces that came with the kit this month, and I also love the digital files! The 'our story' tag on the month card came from the Shake it Off digital files, and they really stretch your stash. I also stamped the 'love your smile' tag using the TLN stamp set this month


The opposite side included a bit less embellishment, but carried the same color scheme across.


My second spread is my favorite for August... possibly for the entire year. I love the muted teal, orange and green colors in the tags as well as the embellishments. Although it is sold out, I love, love, loved the Shake it Off stamp set this month and I used the 'this is what matters' phrase to fill in the tabs of the file folders at the top. The 'look how far we've come' card also couldn't have been more perfect next to the photo of Lizzy in therapy. She's come such a long way this year!


The opposite page has the awesome, 'I am very busy' card, and I love that I used it right next to the picture of Lizzy dusting. I embellished the beige card at the bottom left with stamps from the Shake it Off stamp set and also added the cute cutlery stamp from the Sentiments Series V.2 stamp to the 'goodness' card. 


Here's a look at my three favorite cards from my layouts this month. Nothing over the top, just some simple stamping and applying rub-ons and wood veneer. 

I just received my December This Life Noted kit and I know that September will be a fun month to document too, however, November's kit is still available, so if you're loving what you see in this post, be sure to grab one up before they're gone.


Scraptastic November Layouts

The November kit from Scraptastic, Shake it Off, is my favorite kit so far, and I loved working with it. The bright yellow, coral, muted teal and metallic gold color scheme, and pretty, feminine touches really suited my style. I'd like to share my projects with you using the kit (still available!) and add-on (sold out).
'My Heart is Full': The Shake it Off stamp set (sold out), helped me create this spotted background on this layout- which is my favorite from the month. I kept it very simple and used a black and white photo for lots of contrast.


'Read': The 'storyteller' themed paper and cards in this kit really inspired me to create this layout about Lizzy's love of books. I used the TimerCam app to get this photo back in January and I'm so glad I did. 

'Enjoy These Days Together': This layout records a moment during our trip to New Orleans in May- and my favorite photo from the trip in Audubon Park. I wanted to do something different on this layout & decided to create origami hearts from the patterned paper in the kit. I love the way it turned out- exactly as I had hoped it would. 

'And Then There Were Pumpkins': My last layout for the month utilized the strips of patterned paper leftover in my kit. I got a little 'artsy' on this layout with embossing paste (which I colored with ink spray) and used one of the Jillibean Soup Mini Placemats in the add-on kit (sold out) as a stencil. My favorite part of the layout is the title and journaling area, where I separated my title from my journaling by stamping sentiments using the Shake it Off stamp set (sold out). I also added a pumpkin banner at the bottom using the Free Fallin' stamp set, the other kit offered this month.

Thanks for stopping by. Stop by tomorrow, when I will be sharing my monthly layouts using the November This Life Noted kit