Altenew Painted Butterflies: Just Saying Hello
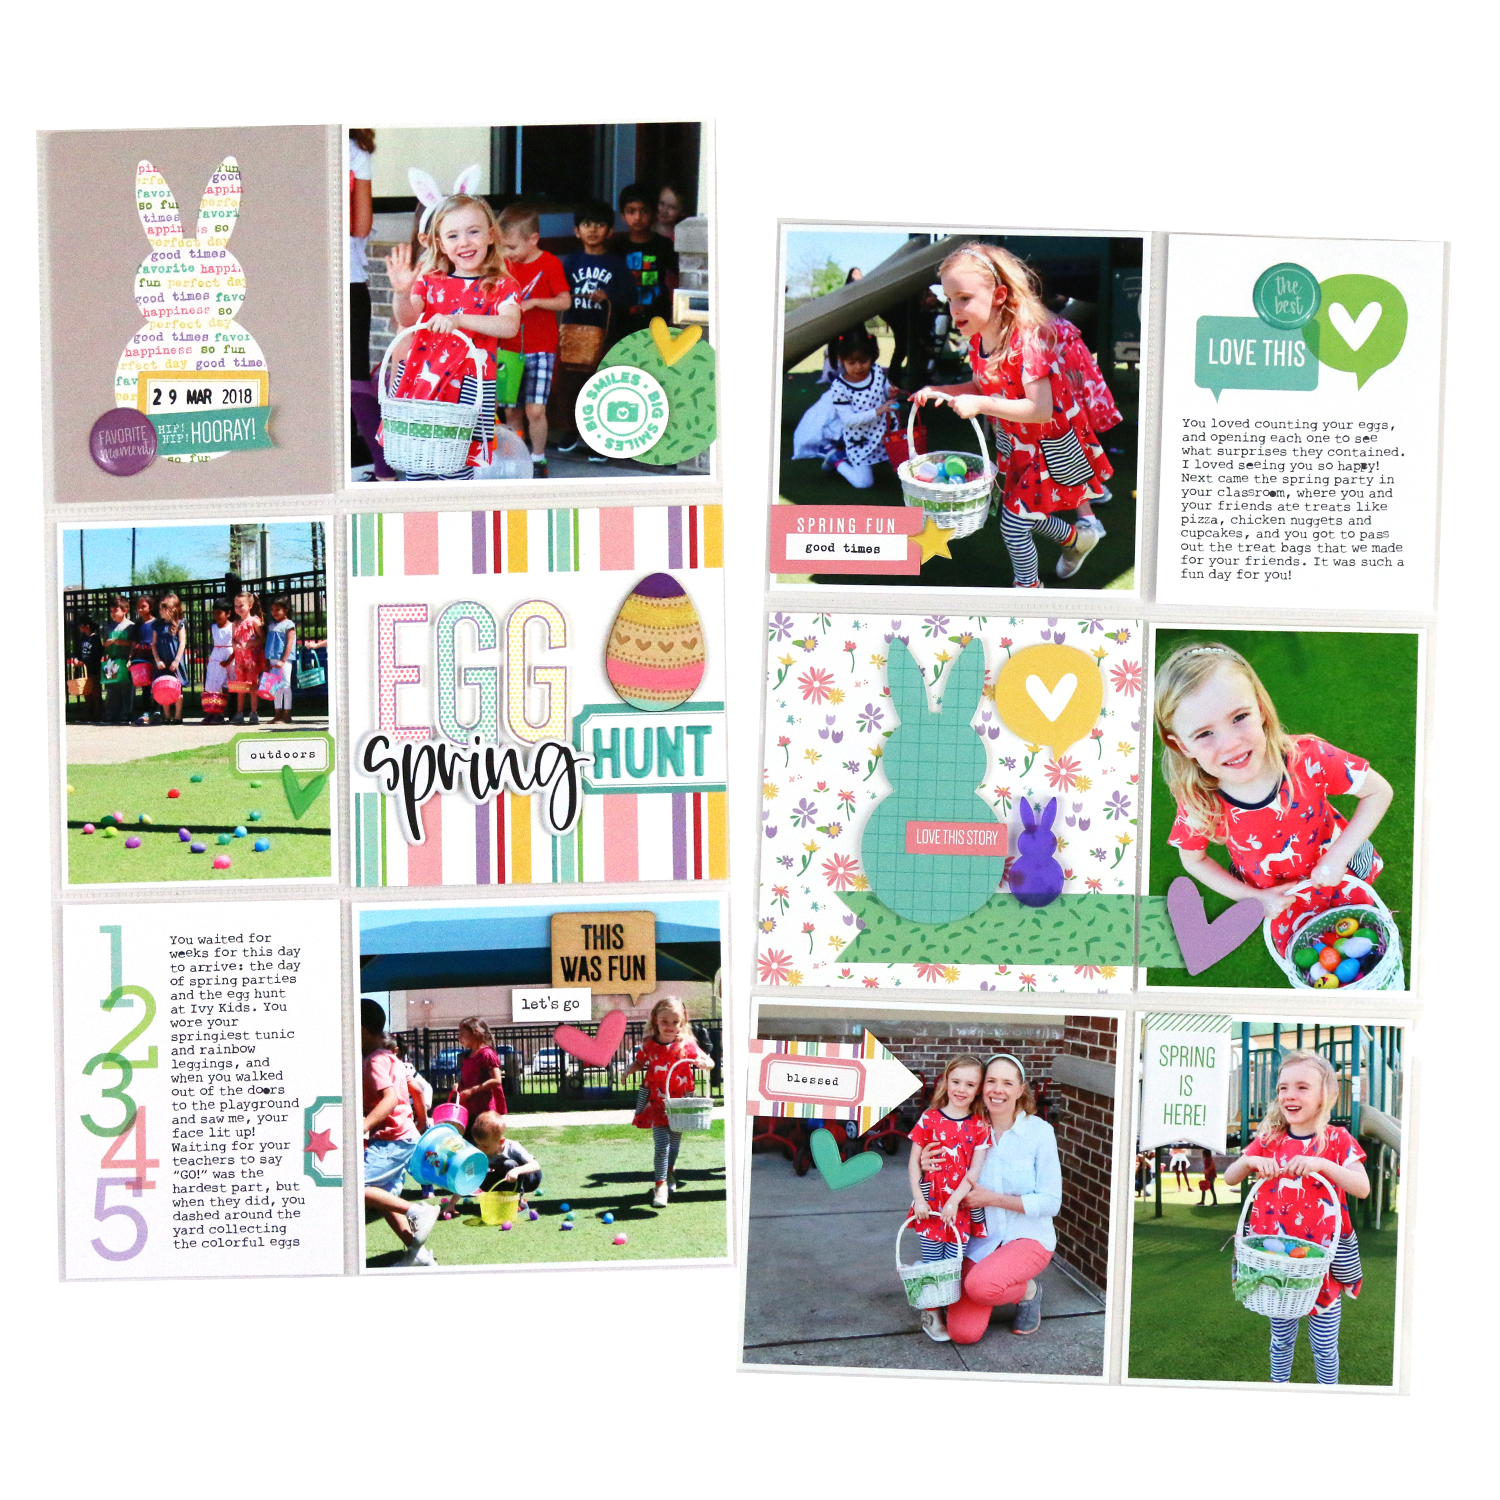
Last week, I was featured as the guest designer on the Altenew blog, and today, I’d love to share my first project with you, a new 8-1/2” x 11” layout all about a trip to visit the butterflies at the Natural History Museum, that turned out exactly as I hoped it would.

Altenew_MeghannAndrew_JustSayingHello_01.jpg

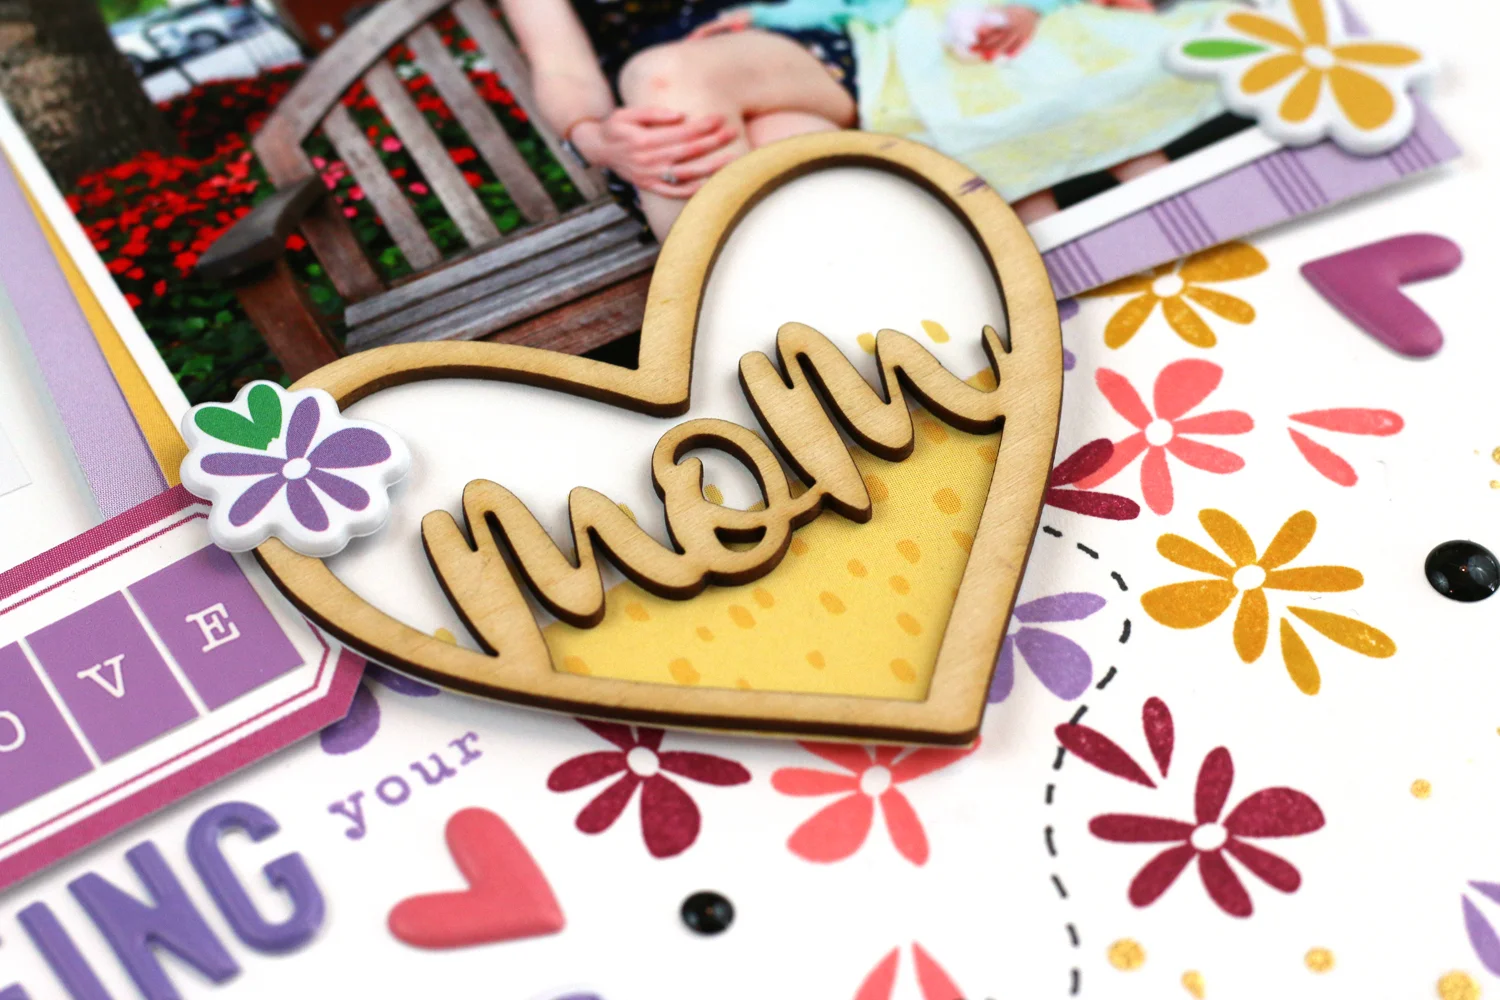
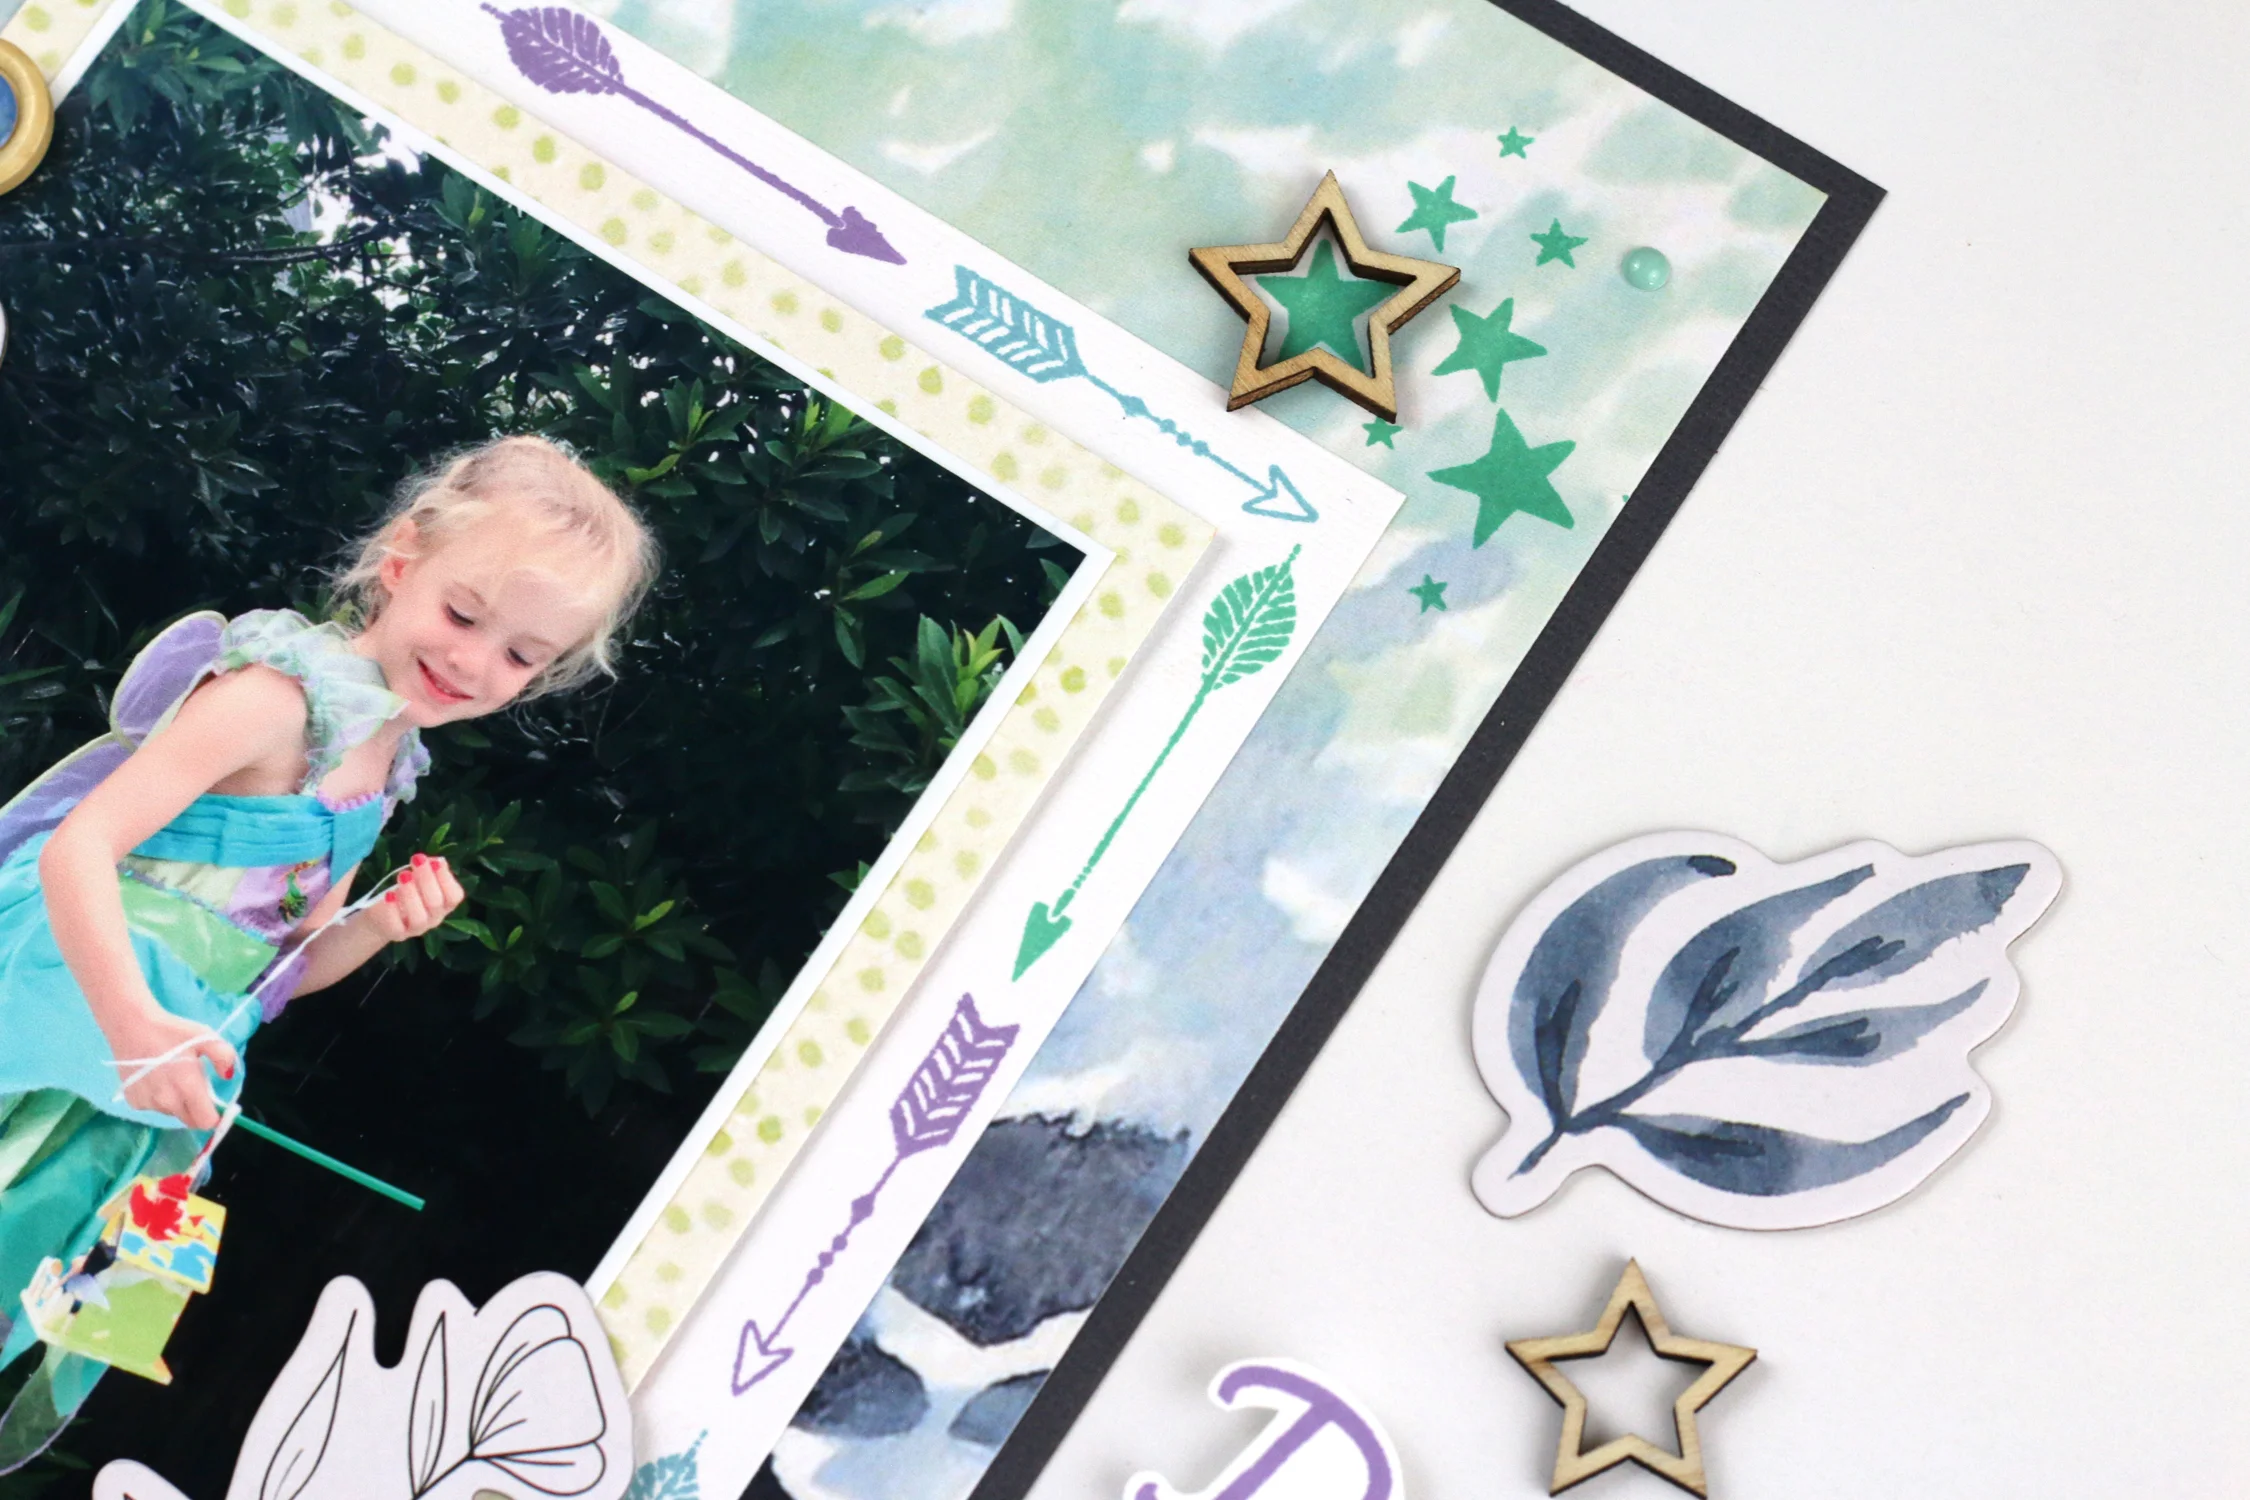
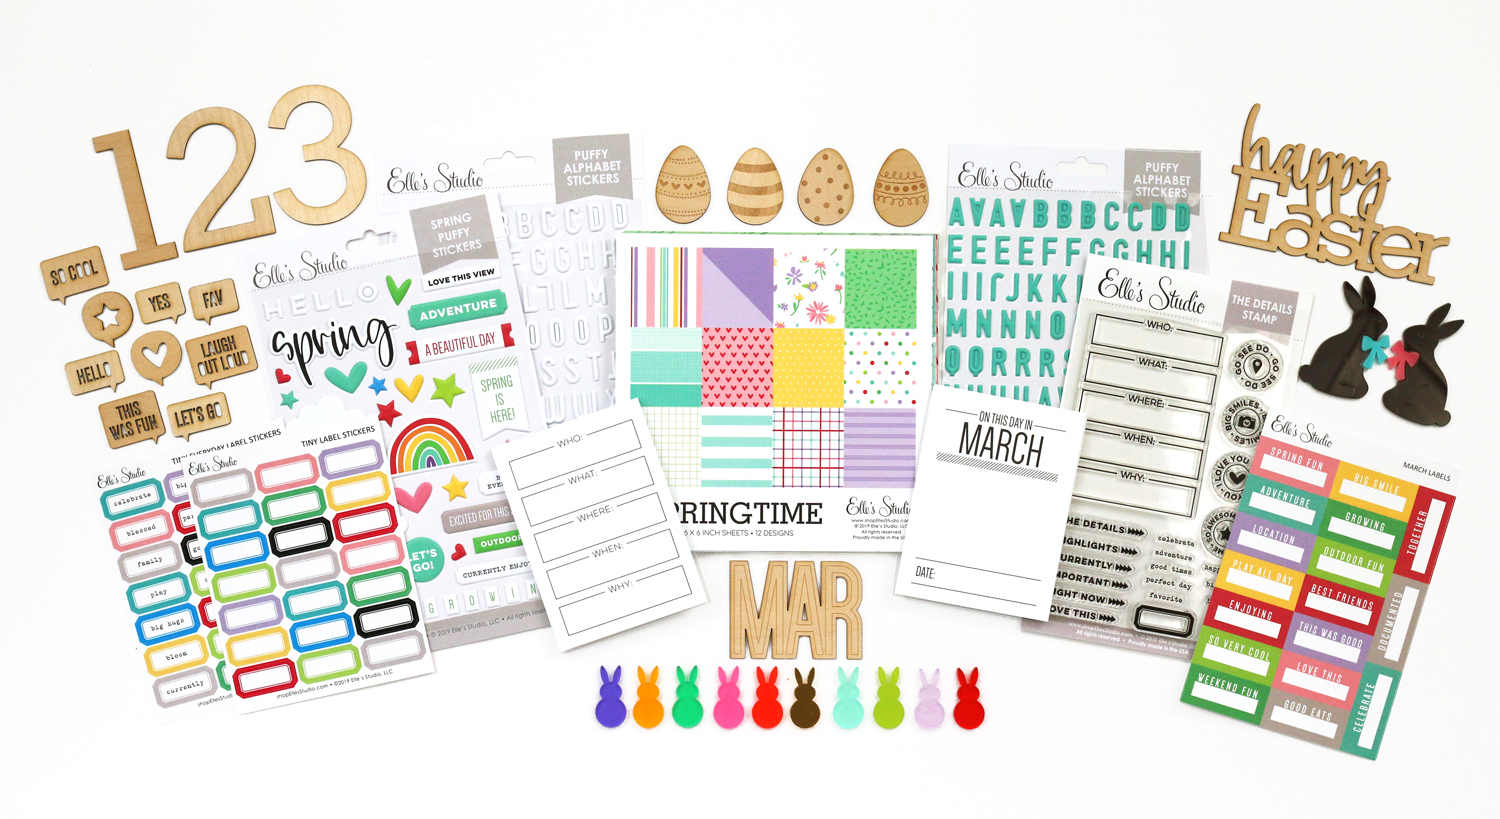
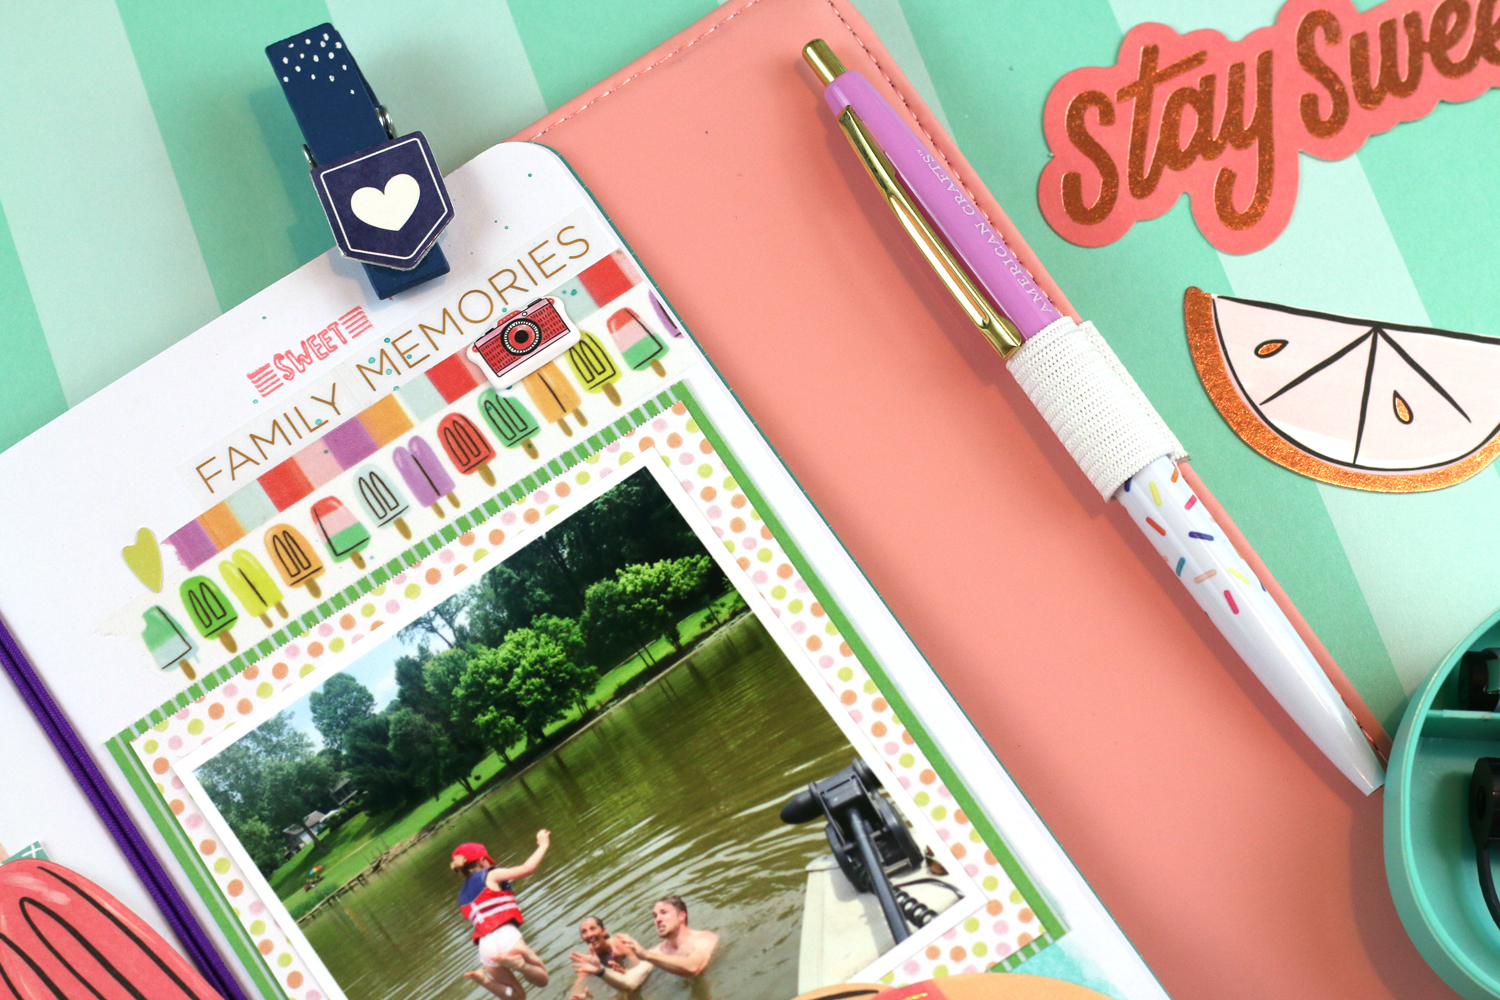
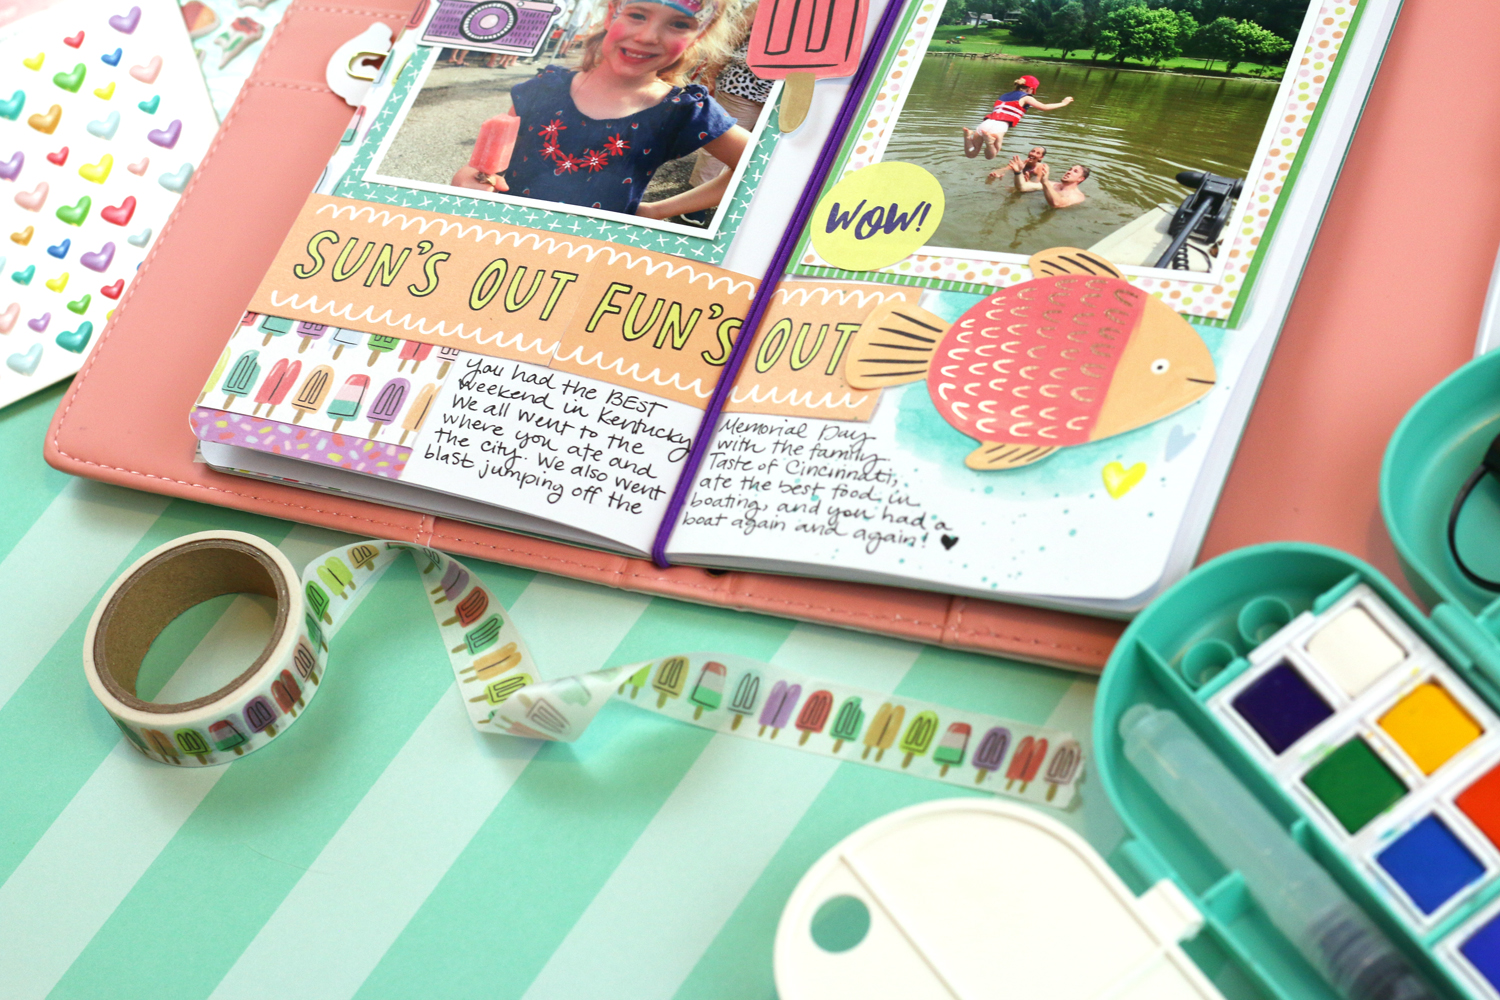
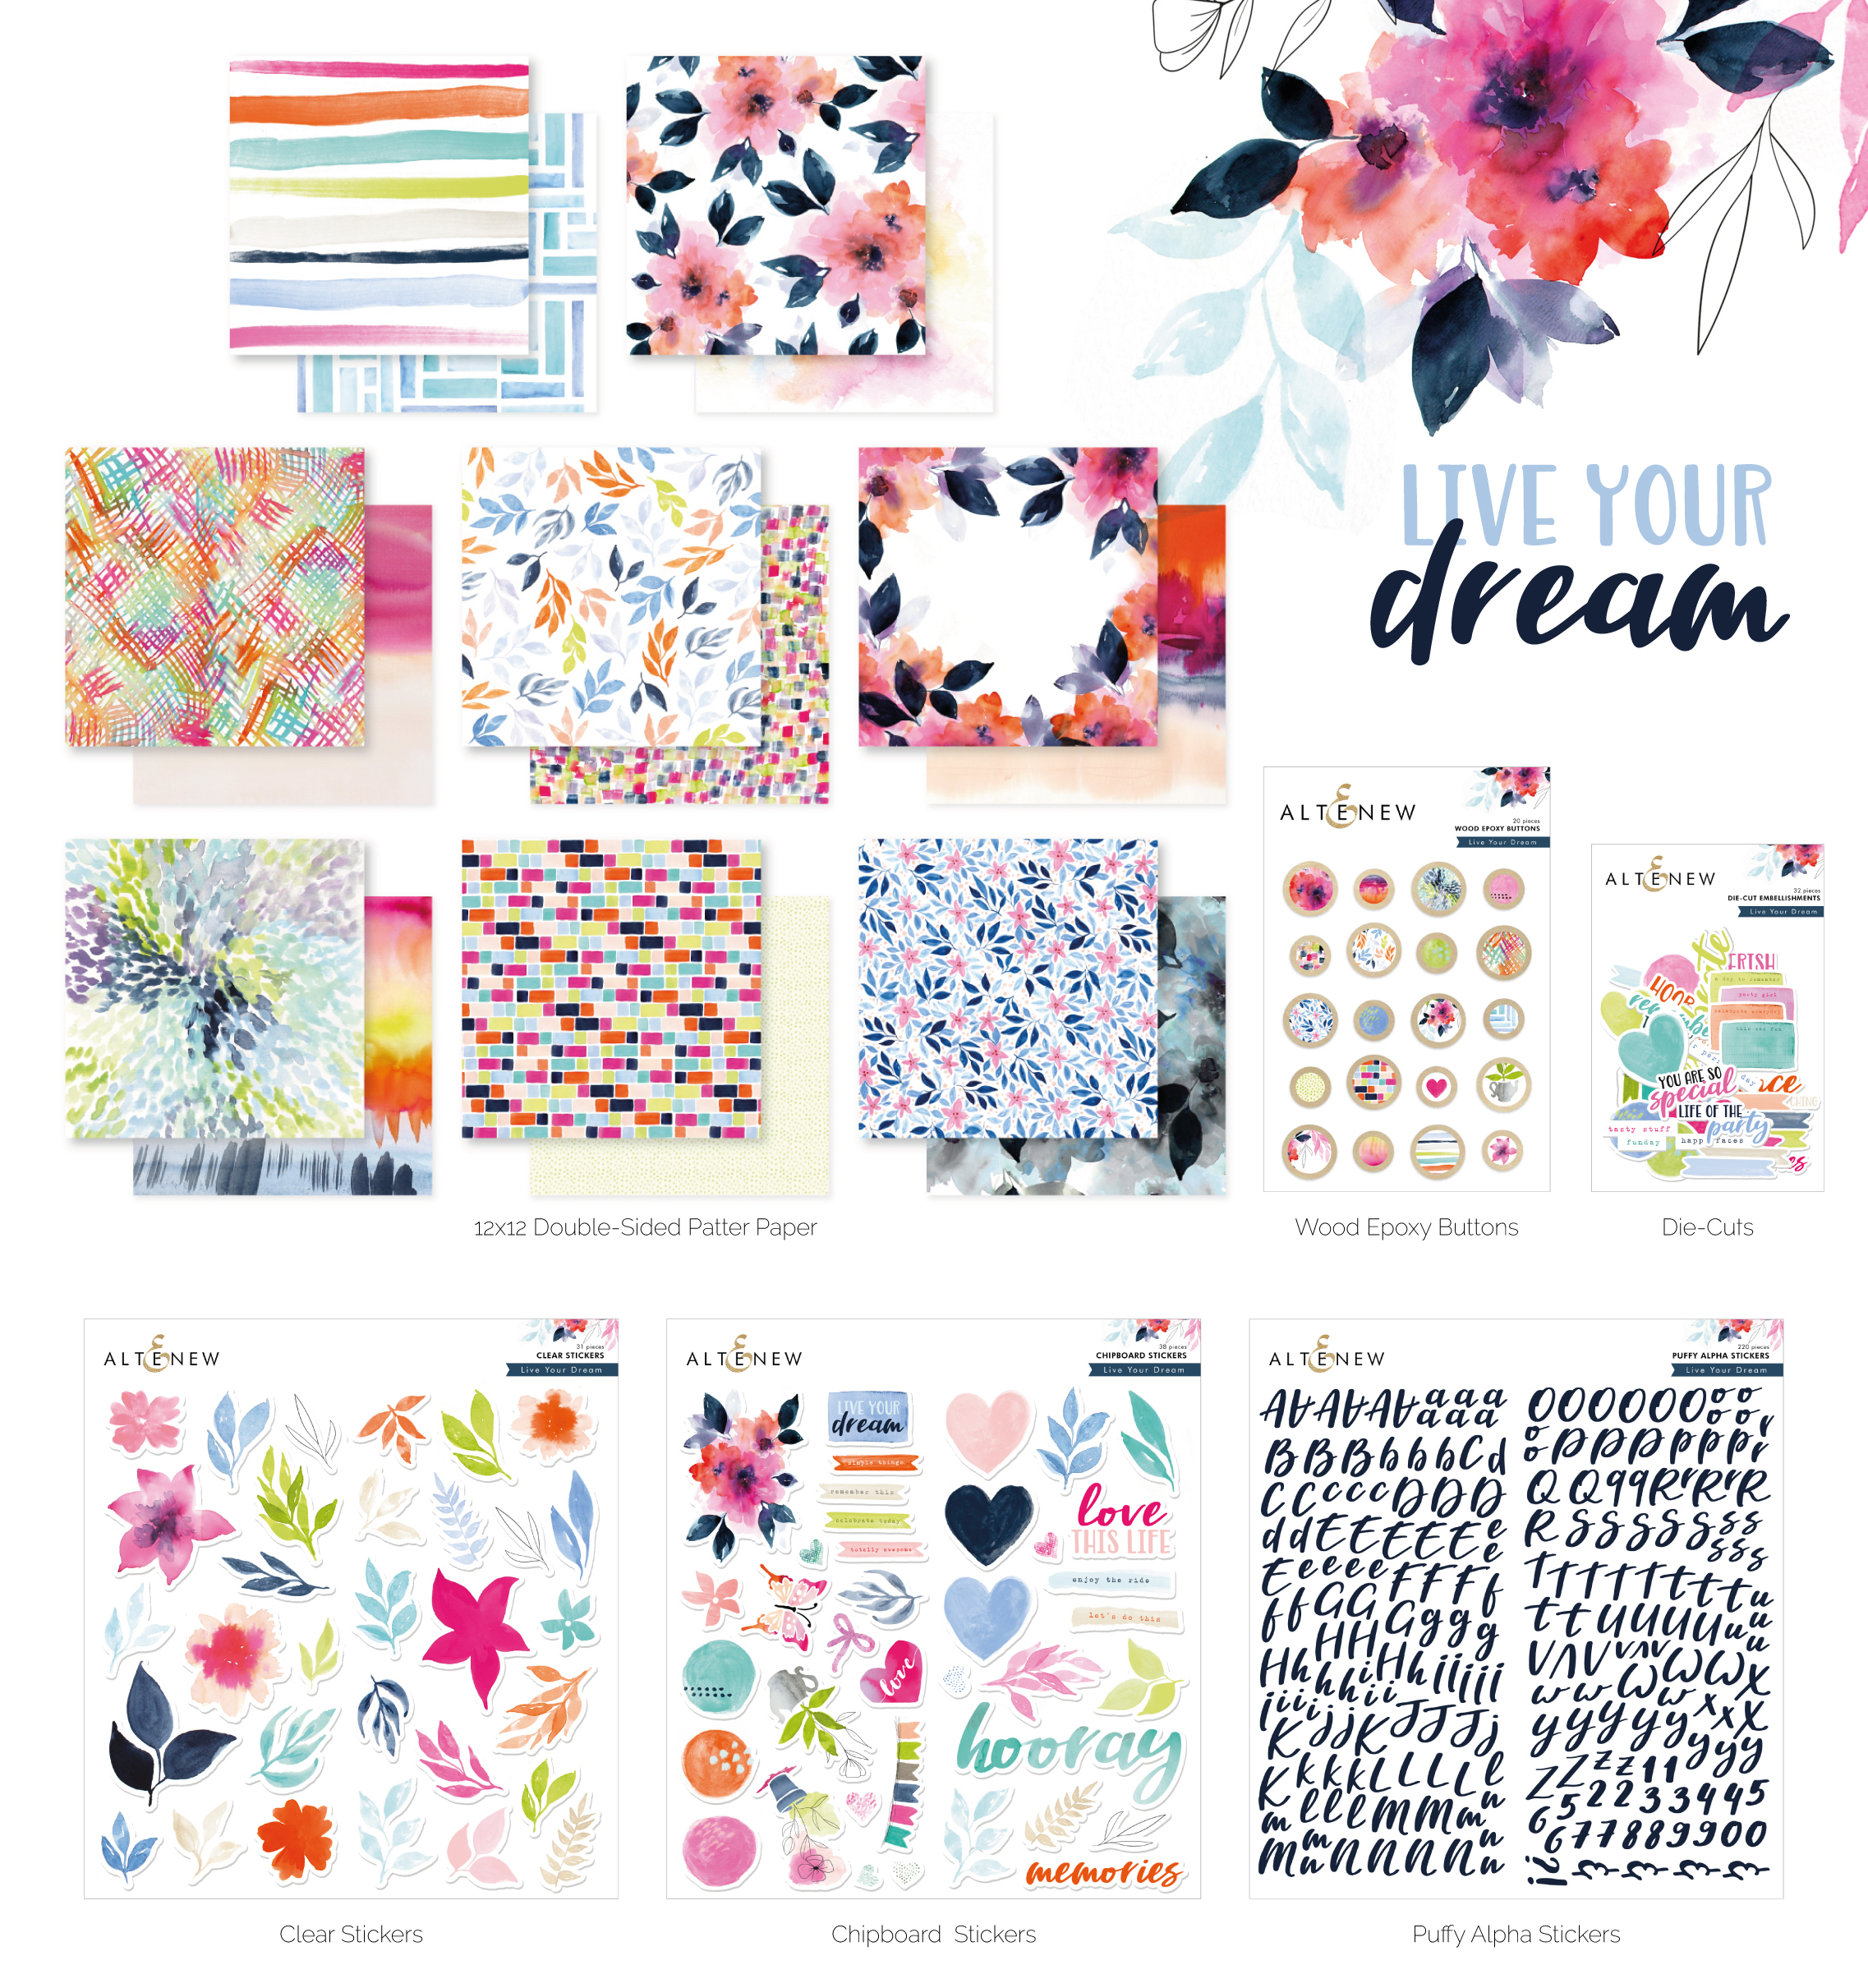
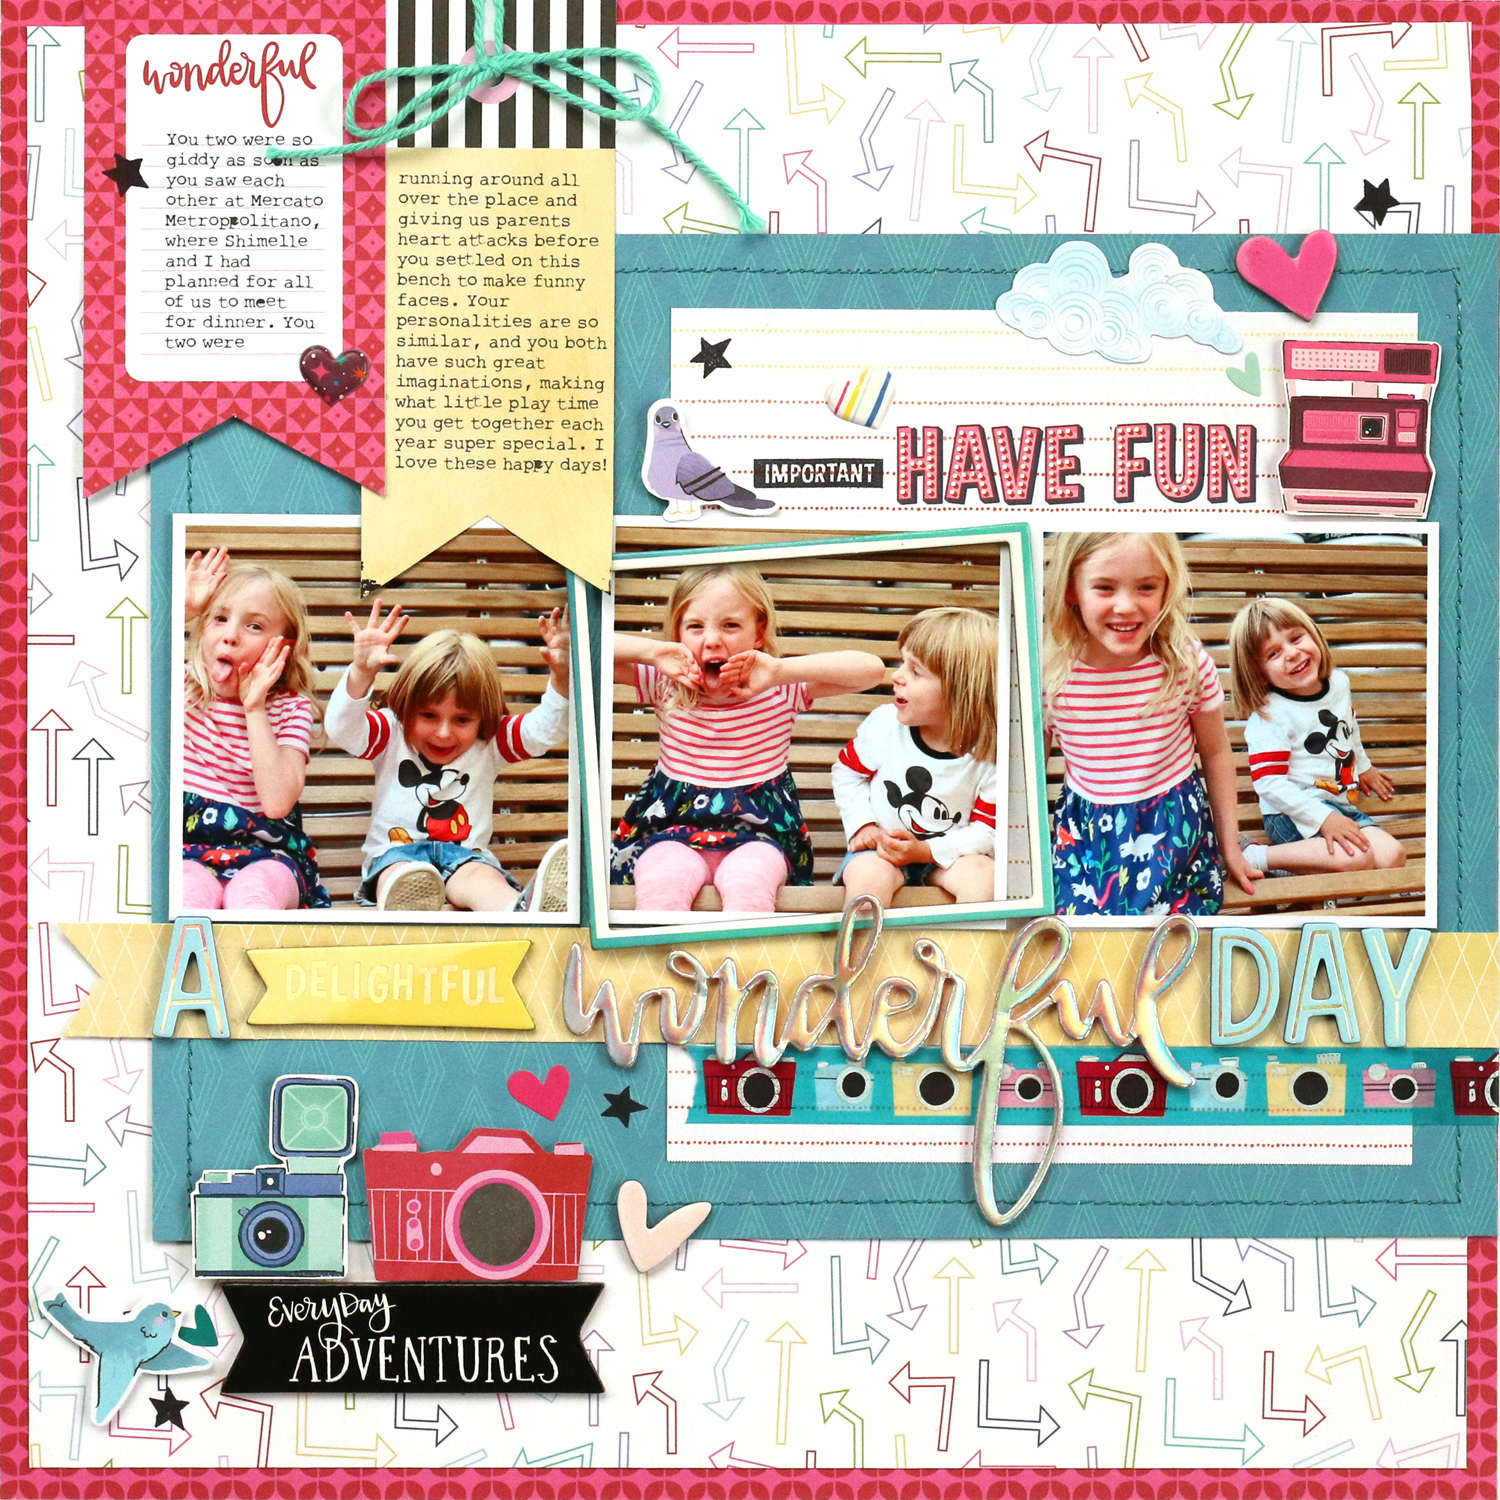
The supplies that I chose to create this layout just fit the photos of my daughter perfectly, so happily holding a butterfly. I wanted a colorful and ethereal feel, and I achieved that with a bit of help from the Live Your Dream Scrapbook Collection*. I started out with an 8-1/2” x 11” background paper from the collection, which gave me the beautiful mixed media feel without any of the mess! From there, I decided that I wanted to match the beautiful colors of the background with anything I added on top.

Altenew_MeghannAndrew_JustSayingHello_02.jpg

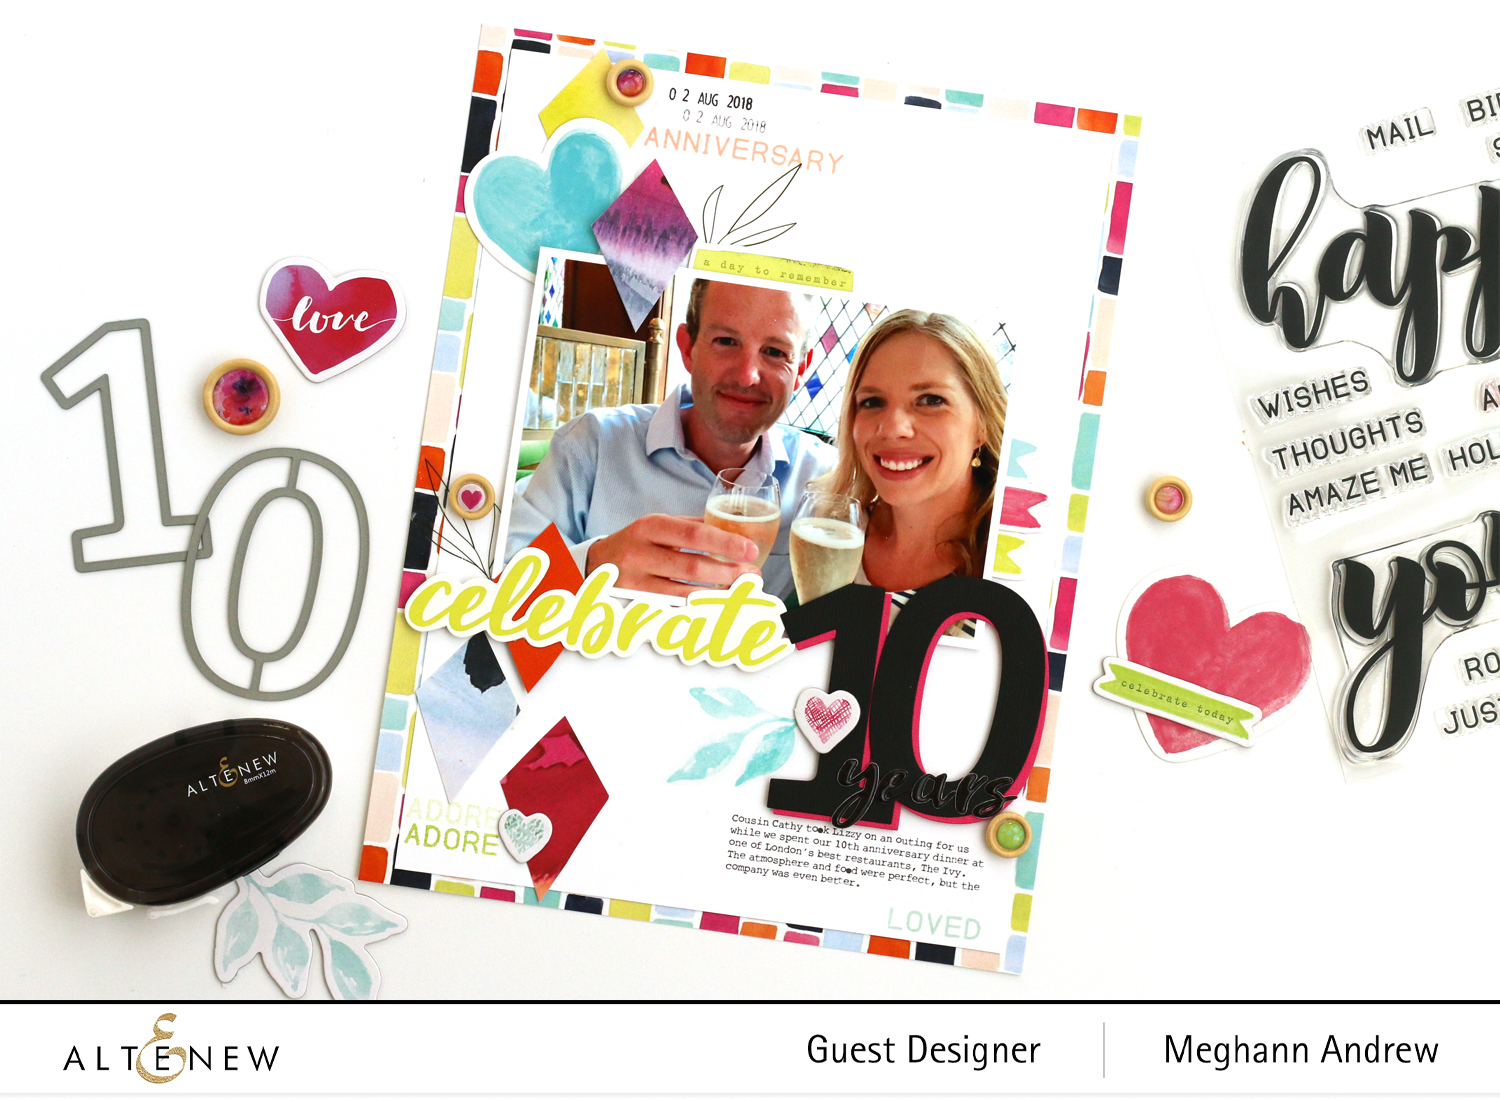
Along with the elements in the Live Your Dream Scrapbook Collection, I stamped the beautiful Painted Butterflies onto white cardstock, as well as vellum, to soften them, and placed them in their corresponding color on the background paper.

Altenew_MeghannAndrew_JustSayingHello_04.jpg

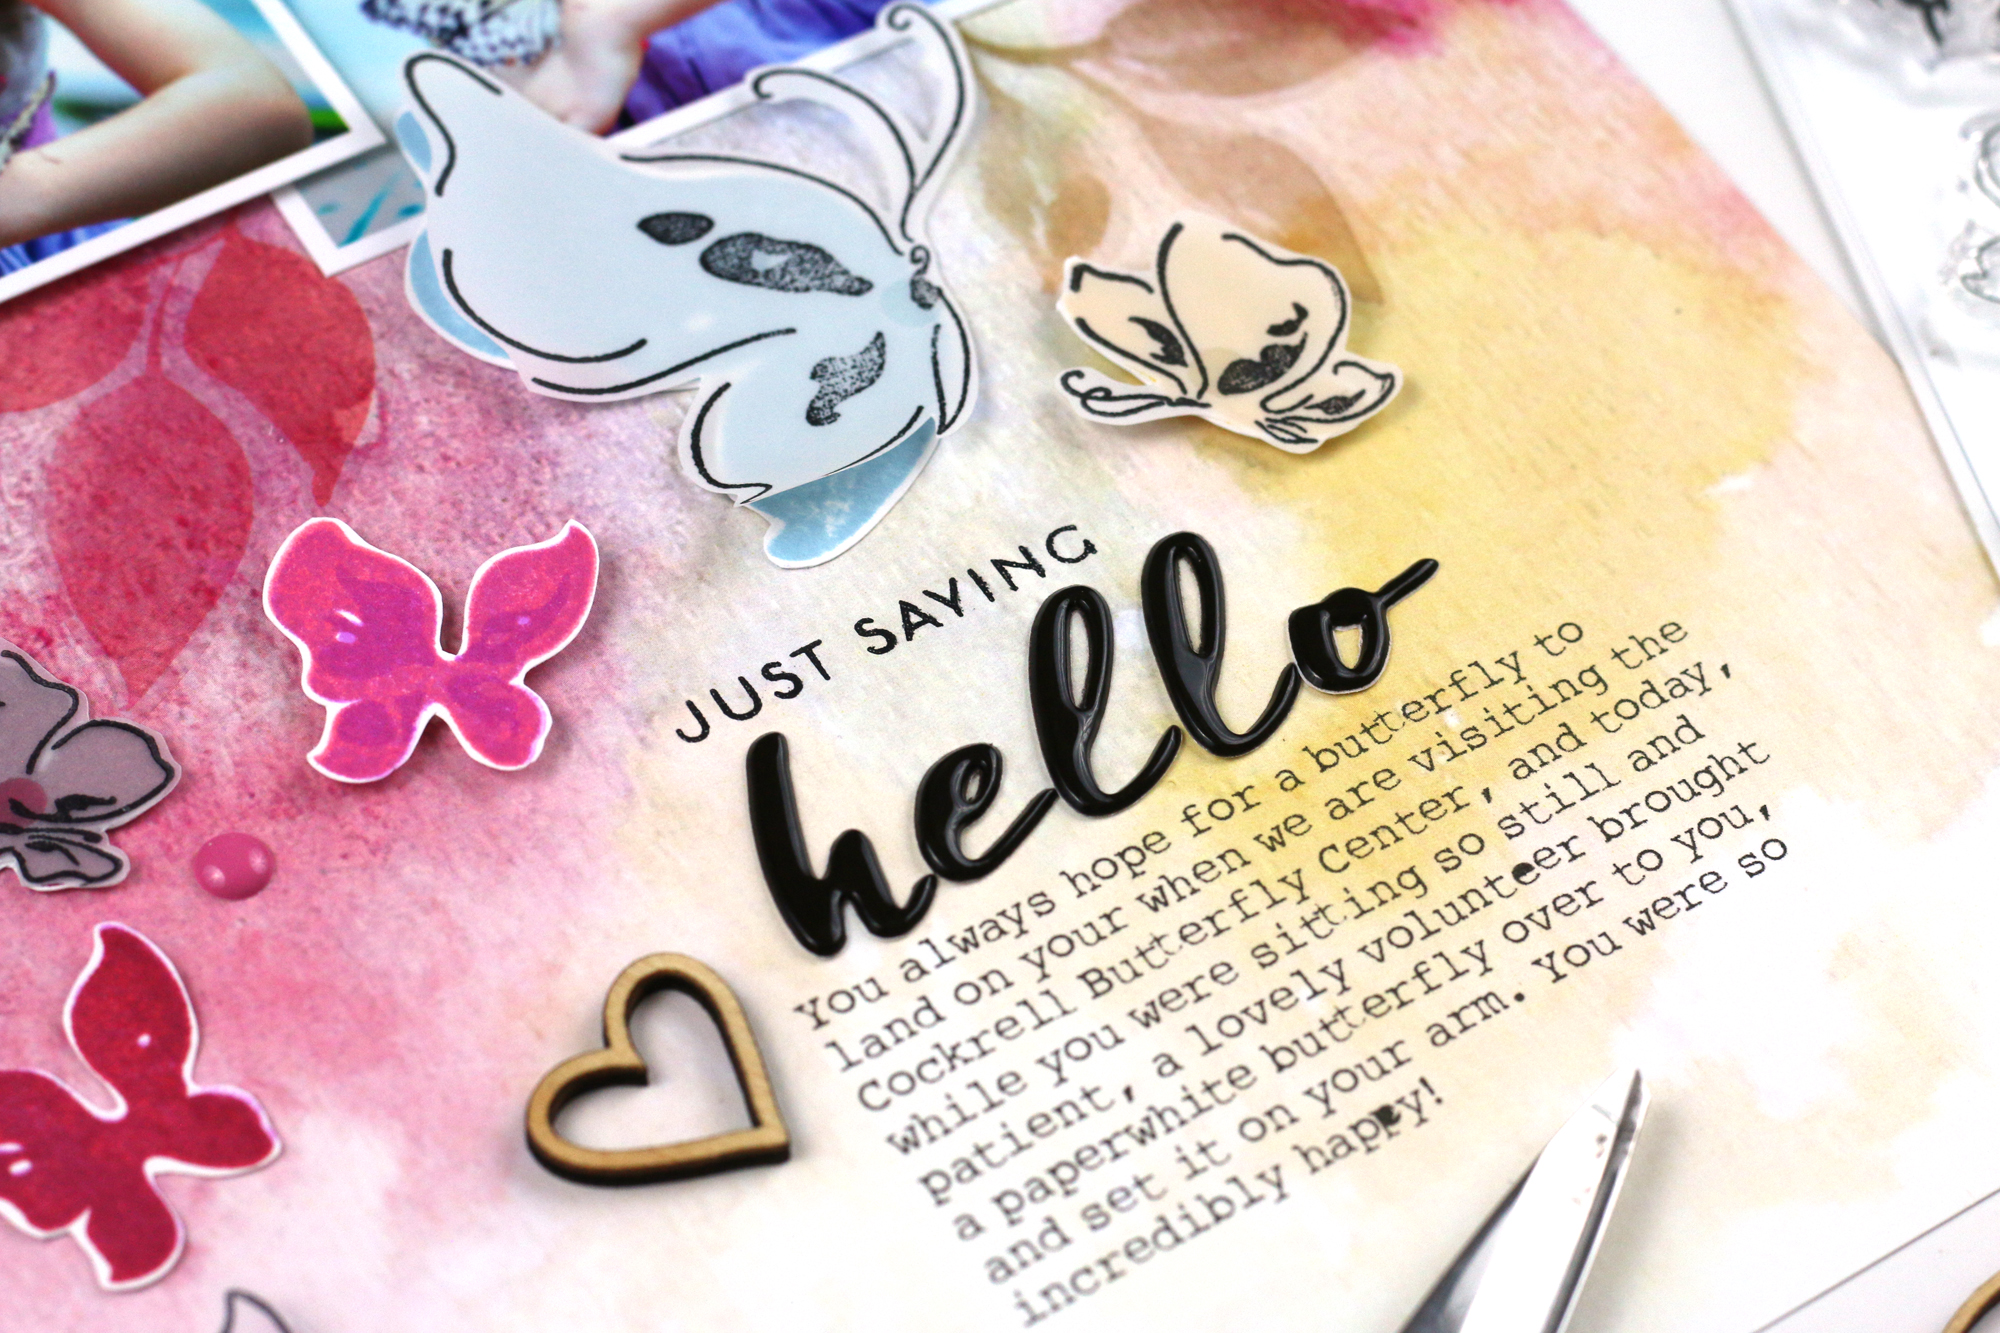
My title, “Just Saying Hello” was perfect for this page, and came about simply because it was one of the sentiments included in the Painted Butterflies stamp set! I wanted the word “hello” to be larger, so I swapped out the stamp word with the puffy black alphabet stickers from the Live Your Dream Scrapbook Collection!

Want to see how this layout came together? Watch the video below to see my process!

Be sure to take a look at the Live Your Dream Scrapbook Collection and Painted Butterflies stamp set in the Altenew shop today, to create your own colorful and dreamy projects! Thanks so much for visiting today and happy creating!

*Clicking these links will take you to the Altenew shop, and when you purchase, I receive a small percentage of the sale. It doesn't cost you any extra, so thanks so much for your support!

Elle's Studio April Kit: I Love Being Your Mom

I have loved working with the April 2019 Kit* from Elle’s Studio, and now that the kit is released, I finally get to share the beautiful products, and the projects that I created with them, with you! In case you missed it, I shared my first layout and process video, Go See Do Adventure, earlier this week. Today I’m sharing a completely different layout that celebrates motherhood, with a photo of me and my girl from last Easter.

EllesStudio_MeghannAndrew_LoveBeingYourMom_01.jpg

Supplies | April 2019 KitApril LabelsDays of the Week Phrase StickersHazel Alphabet Stickers – Light PurpleButterflies and Flowers Puffy StickersShapes and Dots Puffy StickersLight Purple Puffy Alphabet StickersMom Wood VeneerSpringtime 6 x 6 Paper StackWander StampTitle Builder StampNoteworthy 12″ x 12″ Paper Collection

I loved this photo that we took together before service last Easter, and I wanted a pretty, springy feel for this layout to go along with it. I started by wanting to create a clean, but springy background for my layout, with lots of pretty color! The Wander Stamp was the perfect product to use to create a custom background of flowers. After backing my photo with yellow and purple papers from the Springtime 6 x 6 Paper Stack, I paired that grouping with the striped journaling tag from the April Kit and then backed my 8” x 10.5” white cardstock sheet with an 8-1/2” x 11” striped patterned paper from the Noteworthy 12″ x 12″ Paper Collection. These elements created my color scheme, and I used the same colors to stamp pink, mulberry, purple and yellow flowers emanating from my matted photo. I also added some of the petals to get movement and make the flowers seem like they were frozen in motion.

EllesStudio_MeghannAndrew_LoveBeingYourMom_04.jpg

Next, I chose to use the beautiful Mom Wood Veneer to start my title! A yellow and white 3” x 4” tag from the April 2019 Kit was perfect for filling in the background on this wood veneer, which I kept natural!

EllesStudio_MeghannAndrew_LoveBeingYourMom_02.jpg

To add to that wood veneer, I built my title using an April Label, Hazel Alphabet Stickers, Puffy Alphabet Stickers and Title Builder Stamp. Using the different elements in the same purple color helped to keep the title less busy, and easier to read amongst all of the colorful flowers.

EllesStudio_MeghannAndrew_LoveBeingYourMom_03.jpg
EllesStudio_MeghannAndrew_LoveBeingYourMom_05.jpg

Now it was time to add a bit more extra embellishment! For a different texture to my stamped flowers, I grabbed the gorgeous Butterflies and Flowers and Shapes and Dots Puffy Stickers to add among the petals. The butterflies came in handy too! I added them to add even more movement, and drew dashed lines behind them using my favorite Elle’s Studio Sharpie pen. I also added a few drops of gold metallic spray, and a few black enamel dots for some contrast to all of that color.

EllesStudio_MeghannAndrew_LoveBeingYourMom_06.jpg

This photo, and now this layout, makes me so happy, and it was so fun to create with the April 2019 products from Elle’s Studio! Thanks so much for stopping by, and I hope you’ve been inspired to create your own spring layout! Be sure to shop the products that I used on this layout in the gallery below, while supplies last!

*Clicking these links will take you to the Elle's Studio shop, and when you purchase, I receive a small percentage of the sale. It doesn't cost you any extra, so thanks so much for your support!

Elle's Studio April 2019 Reveal Day!

I’m so excited to share the latest products for April* just released from Elle’s Studio today!

Check out this beautiful, new April Kit! All of the beautiful colors and spring illustrations on these 3” x 4” and 4” x 6” tags, along with fun die cuts, combine to bring beauty to your layouts, cards, traveler’s notebooks and pockets!

Don’t forget about the amazing add-ons this month! There are some wonderful wood veneers, THREE new puffy sticker sheets, new scripture tags and more to add to your projects along with the kit contents!

This month, I started out creating a fun 8-1/2” x 11” layout that began with the Wander printables, which is just one of the four new digital files that you can find in the shop this month! I loved the design of that green “adventure” tag so much, I decided to make it into a layout, so that’s just what I did!

I used the digital file of that single tag, scaled it to 8-1/2'“ x 11'“ and printed it for a really fun and graphic layout background!

EllesStudio_MeghannAndrew_GoSeeDoAdventure_01.jpg

When paired with my photo, and the awesome add-ons from this month’s new product, including my favorite Go See Do acrylic, this layout turned out to be so special! And it all started with a digital printable! Take a look at my process video to see how the entire page came together in just a few minutes!

Thanks so much for watching! Be sure to subscribe so that you don’t miss out on any future ES process videos! You can find all of the product that I used on this layout at my shoppable gallery below, and thanks so much for stopping by today!

*Clicking these links will take you to the Elle's Studio shop, and when you purchase, I receive a small percentage of the sale. It doesn't cost you any extra, so thanks so much for your support!

Altenew 5th Anniversary Blog Hop Day 3 + Giveaway

2019-Anniversary-BlogHop-Graphic.jpg

Hello friends! Today I’m excited to be joining on the Altenew 5th Anniversary Blog Hop on day three! Be sure to check out the Altenew blog for the full hop details, but you can also find all of the stops for today’s hop listed below!

Today I’m sharing a new layout with you, created with the lovely Live Your Dream Scrapbook Collection*!

Altenew_MeghannAndrew_FairyHome_01.jpg

Supplies | Live Your Dream Scrapbook Collection, Happy Dreams Stamp Set, Our Family Wooden Veneers, Our Family Enamel Dots

Combining the Live Your Dream Scrapbook Collection with the Happy Dreams Stamp Set created a dreamy, ethereal layout to document my daughter, dressed as a fairy, hanging her newly-built fairy house.

Altenew_MeghannAndrew_FairyHome_02.jpg

Around my photo, I created a frame of patterned paper, then white cardstock, stamped with the fun arrows from the Happy Dreams Stamp Set. The cute teapot planter chipboard sticker was perfect for adding to the corner of my photo.

Altenew_MeghannAndrew_FairyHome_04.jpg

I love my title, which I created with the black alphabet stickers in the Live Your Dream Scrapbook Collection and the “home” wood veneer word found in the Our Family Wooden Veneers. I added this title to the bottom left corner of my photo, just below my journaling, which I printed onto vellum, and backed with a Live Your Dream Scrapbook Collection paper.

Altenew_MeghannAndrew_FairyHome_05.jpg

In the corners of my layout, I stamped the star clusters from the Happy Dreams Stamp Set, then embellished further with Our Family Wooden Veneer stars and Our Family Enamel Dots. All of these products came together so perfectly to create a magical page!

Now for the fun part! Leave a comment here on this blog post by 4/12/2019 for a chance to win! 33 winners will be chosen at random from the comments left on any of the blogs listed below to win a plethora of amazing prizes and the winners will be announced on the Altenew Blog on 4/20/2019. Be sure to stop by each participant’s link below and leave a comment for the most chances to win:

Altenew
Laura Bassen
Erum Tasneem
My Sweet Petunia
Virginia Lu
Nathalie DeSousa
Heather Hoffman
Scrapbook & Cards Today
Anna Kossakovskaya
Amanda Baldwin
Galina Filippenko
Irit Landgraf
Simply Cards & Papercraft
Kelly Griglione
Meghann Andrew
Olga Moss
Heidi Jakobs

Thanks so much for stopping by and happy creating!

*Clicking these links will take you to the Altenew shop, and when you purchase, I receive a small percentage of the sale. It doesn't cost you any extra, so thanks so much for your support!

Elle's Studio March Kit Reveal!

The March kit and add-ons* are now live in the Elle’s Studio shop, and I have a brand new unboxing video to show you all of the new goodies! Take a look:

How about a look at the beautiful, springy March 2019 kit?! These tags and die cuts will have you documenting your springtime memories in a beautiful way, whether you are recording everyday life, or special holiday events!

Don’t forget about these amazing add-ons to embellish your projects! From beautiful new patterns to yummy chocolate bunnies, you’ll want to add a few of these to your projects this month!

I started out by creating some Easter cards this month! I could not resist using the wonderful Easter wood veneer or acrylic pieces, and I had a great time with all of the patterns in the Springtime 6 x 6 paper stack!

Supplies | March 2019 Kit, March Digital Cut File, Spring Puffy Stickers, Wood Veneer Easter Eggs, Happy Easter Wood Veneer, Chocolate Acrylic Bunnies, Springtime 6 x 6 Paper Stack, The Details Stamp

Fun, right? I also created a new pocket page spread, all about my daughter’s favorite spring pastime: egg hunting! I love the happy day that this project documents, and the March kit and extras were perfect to pull it all together in my album.

Do you want to see how I put this pocket page spread together using my new ES goodies? Take a look!

I hope you enjoyed taking a peek into my process, and I hope YOU enjoy creating with the Elle’s Studio March goodies as much as I have! Shop all of the product that I used to create this page via my gallery below, which will take you right to the ES shop. Thanks for your support of my YouTube feed and blog by clicking, and happy creating!

*Clicking these links will take you to the Elle's Studio shop, and when you purchase, I receive a small percentage of the sale. It doesn't cost you any extra, so thanks so much for your support!

American Crafts Journal Studio Notebook: Sun's Out, Fun's Out!

I’m still working on the traveler’s notebook project that records my daughter’s favorite memories from 2018, and today I’m here to share May’s installment with you! This fun traveler’s notebook spread, created with the American Crafts Journal Studio* and Amy Tangerine Stay Sweet collection, records a wonderful Memorial Day weekend spent in Kentucky with my family.

AmericanCrafts_MeghannAndrew_SunsOutFunsOutTN_01.jpg

Supplies | Journal Studio collection: Watercolor Stripe journal kit, Hello journal insert, Amy Tan sticker book, Amy Tan sticker book, Journal Studio sticker book, Good Vibes Only gel pens; Stay Sweet collection: Summer Love paper, 6” x 8” paper pad, ephemera pack, sticker book, mini puffy stickers, epoxy heart stickers, washi tape, rotary phrase stamp, watercolor set; Other: Dear Lizzy clothespins (I like to keep my notebooks open with these when photographing)

These little spreads are really growing on me, and I am loving creating them with similar products each month. I typically start with some of the Journal Studio products that work perfectly with anything I wish to document, then I match those with a current AC collection. The Stay Sweet collection, with it’s summer vibe and bright, fun colors worked perfectly for this start-of-summer spread.

After my photos were printed and layered with papers from the 6” x 8” paper pad, including that fun popsicle print, I chose my title, “sun’s out, fun’s out,” which I cut from the Summer Love paper. This bold, fun strip of my title brought my left and right sides together right away.

AmericanCrafts_MeghannAndrew_SunsOutFunsOutTN_03.jpg

Above that title, I added my photos, which I topped with an ephemera popsicle, camera and fun fish, which was perfect to use with the photo of my daughter jumping off of the boat into the river.

AmericanCrafts_MeghannAndrew_SunsOutFunsOutTN_04.jpg

Before I adhered my fish down, I added a bit of turquoise watercolor paint from the amazing travel watercolor set. I just can’t get enough of this compact paint set! I also added some splatters on the right side using the water brush included in the set. The “wow” sticker from the Journal Studio sticker book coordinated perfectly with the yellow found in the Stay Sweet collection, and was perfect for adding to the corner of my photo.

AmericanCrafts_MeghannAndrew_SunsOutFunsOutTN_05.jpg

The final touches that I added were two strips of washi tape at the top of my photo. The popsicle washi tape matched the pattern on the left side, again tying the two sides together. On top of the striped washi, I added the stickers “family” and “memories” from the Amy Tan sticker book, then stamped “sweet” using the Stay Sweet rotary phrase stamp.

AmericanCrafts_MeghannAndrew_SunsOutFunsOutTN_07.jpg

That’s another fun memory documented for my daughter in such a fun and easy way using Journal Studio and the Amy Tangerine Stay Sweet collection! Thanks so much for stopping by. Be sure to check out the products that I used in the Scrapbook.com gallery below! Happy creating!

Gina K. Mega Wreath Builder Template: Wish Upon a Star

GinaKDesigns_MeghannAndrew_WishUponAStar_02.jpg

When I attended Creativation this year, I saw Gina K. Design’s Mega Wreath Builder* Template in action for the first time. Just like the Mini Wreath Builder template, which is perfect for creating a precise circle of stamped elements on cards, the Mega Wreath Builder does the same in a larger size! I immediately thought that it would be perfect for a scrapbook page, and I paired it up with Shimelle’s Head in the Clouds collection to create a new layout to share with you today.

GinaKDesigns_MeghannAndrew_WishUponAStar_01.jpg

Supplies | Gina K. Mega Wreath Builder template + Memory Misti or Mega Wreath Builder template (if you already have a Memory Misti), All Star stamp, Head in the Clouds Let’s Dream paper, Look to the Stars paper, Believe in Magic paper, Kiss a Frog paper, Head in the Clouds ephemera, Head in the Clouds cardstock stickers, Head in the Clouds chipboard stickers

Creating a wreath for my photo made it the perfect focal point for this layout that records a special moment at Disney World, and the “Wish Upon a Star” title was perfect for this magical page!

GinaKDesigns_MeghannAndrew_WishUponAStar_08.jpg

I took my color inspiration from the Head in the Clouds Look to the Stars paper. This colorful striped pattern was perfect for adding to my page background.

GinaKDesigns_MeghannAndrew_WishUponAStar_03.jpg

To add a diagonal line of embellishment on my page, the Head in the Clouds cardstock stickers, chipboard and ephemera added more magical touches, and spread those stars that I started with in my wreath, around the page.

GinaKDesigns_MeghannAndrew_WishUponAStar_04.jpg

Watch how I created my star wreath using the Gina K. Mega Wreath Builder template + Memory Misti. This bundle is currently on sale at Gina K. Designs for only $99, the price of the Misti itself! In this video, you’ll see how I built my wreath of stars around my photo, adding different colors and mediums to really bring your eye to my photo on the page:

Thanks so much for stopping by my blog today! I hope you loved seeing this page, as much as I loved creating it with the Mega Wreath Builder template! Happy creating!

*Clicking these links will take you to the Gina K. Designs shop, and when you purchase, I receive a small percentage of the sale. It doesn't cost you any extra, so thanks so much for your support!

Altenew Live Your Dream Scrapbook Collection Release Blog Hop + Giveaway

Scrapbook Collection Release_Blog Hop.jpg

I am so excited that the new Altenew scrapbook collection, Live Your Dream* is now live and in the Altenew shop! The Live Your Dream Scrapbook Collection is a bright and elegant line that you can use to document any occasion. From the little daily moments, you want to remember forever to bigger milestones like parties and birthdays.

All of the products in this collection are very versatile and you can use them for many different projects such as 12x12 layouts, pocket scrapbooking, cards, home decor, and much more.

This collection contains

  • 16 sheets of 12x12 double-sided patterned papers (2 of each/16 different designs)

  • 2 6"x12" sheets of puffy alphabet stickers (220 pieces)

  • 2 6"x12" sheets of chipboard stickers (38 pieces)

  • 2 6"x12" sheets of clear stickers (31 pieces)

  • 1 pack of wood epoxy buttons (20 pieces)

  • 1 pack of die-cut cardstock embellishments (32 pieces)   

I was so excited to document a momentous occasion with these new products, my 10 year wedding anniversary, and a fancy dinner out in London!

Altenew_MeghannAndrew_Celebrate10Years_01WM.jpg

Supplies | Live Your Dream scrapbook collection, Mega Number Die #1, Mega Number Die #0, Mega Greetings 2 Stamp

To tie in the beautiful surroundings in the restaurant to my layout, I cut colorful diamonds out of the brightly watercolored patterned paper.

Altenew_MeghannAndrew_Celebrate10Years_03.jpg

I also loved adding the big #10 using the Mega Dies!

Why not check out how I put this page together in my process video:

Giveaways: To celebrate this release, Altenew is giving away a $50 gift certificate to 6 lucky winners! Please leave a comment on the Altenew Card Blog and/or Altenew Scrapbook Blog by 2/28/2019 for a chance to win. 6 winners will be announced on the Altenew blogs on 3/3/2019.

Head to the other creatives in the hop to see more inspiration using these fantastic new products:

Altenew Scrapbook Blog

Paige Evans

Enza Gudor

Kathleen Graumüller

Jen Schow

Zinia Redo

Bea Valint

Raquel Bowman

Sandra Dietrich

Amanda Baldwin

Maryam Perez

Svitlana Shayevich

Missy Whidden

Altenew Card Blog

Nathalie DeSousa

Kymona Tracey

Patricia Roebuck

Lydia Evans

Terhi Koskinen

Lilith Eeckels

Meghann Andrew (you are here)

Reiko Tsuchida

Flóra Mónika Farkas

Virginia Lu

Kim Jeffress

Elsie Robinson

Laurie Willison

Kelly Janes

Erum Tasneem


Thanks so much for stopping by, and happy creating with this beautiful, new collection!

*Clicking these links will take you to the Altenew shop, and when you purchase, I receive a small percentage of the sale. It doesn't cost you any extra, so thanks so much for your support!

Elle's Studio February Reveal!

Hello and happy Sunday! Today is the day of the Elle’s Studio February 2019 kit and add-on* reveal, and I couldn’t be more excited about what I’m showing you today! First, let’s take a look at all of the new goodies in my unboxing video:

Take a look at the rainbow of colors in the February kit! There are so many color possibilities here:

EllesStudio_February2019_Kit_01.jpg

If you thought that the kit was full of possibility, take a look at the February add-ons! From a wide range of stamps, labels, puffy stickers and acrylics, there are so many beautiful additions that can be combined with the kit to create something wonderful.

EllesStudio_February2019_Add-Ons_01.jpg

The digital files this month are also perfect to add to your digital library. With a wide range of cut files, labels and printables that coordinate with the kit, you won’t want to miss having them on your desk while creating.

EllesStudio_February2019_February-Digitals.jpg

Now that I’ve shown you all of this beautiful project, let me share what I created with it!

EllesStudio_MeghannAndrew_Tate_01.jpg

The Wonderful Colors at the Tate by Meghann Andrew – supplies used | February 2019 KitFebruary 2019 Digital Cut FileFebruary LabelsBright Die Cut LabelsReal Life Phrase StickersWood Veneer ConfettiPuffy Icon StickersLight Purple Puffy Alphabet StickersBlack Puffy Alphabet StickersLittle Acrylic StarsOh Happy Day StampLarge Jane Alphabet Stamp – OutlineLarge Jane Alphabet Stamp – StripesLarge Jane Alphabet Stamp – Polka DotHazel Alphabet StampNoteworthy 12 x 12 Paper Collection

This fun and bold layout records a day spent at the Tate Modern Museum in London, and the bold colors in my photos were the perfect match to the rainbow of colors in the kit. I started off my layout with the “wonderful” die-cut included in the February 2019 Digital Cut File, and continued to build my title with the Large Jane Alphabet Stamps (the outline, and new stripes and polka dot!) Black Puffy Alphabet Stickers and Hazel Alphabet Stamp.

EllesStudio_MeghannAndrew_Tate_05.jpg

On the left side of my page, I added ALL OF THE COLOR; in a rainbow of tags and die-cuts coming from the left side of my photo strip. I accented with embellishment, like the Puffy Icon Stickers and Little Acrylic Stars to match the colors along the edge of the page.

EllesStudio_MeghannAndrew_Tate_03.jpg

Want to see how all of these beautiful products came together to create this page? Take a look at my process video:

Thanks so much for stopping by today, and I hope you’ll check out all of the new Elle’s Studio product that I used to create this layout by clicking through the gallery below. Happy creating!

*Clicking these links will take you to the Elle's Studio shop, and when you purchase, I receive a small percentage of the sale. It doesn't cost you any extra, so thanks so much for your support!

American Crafts & Shimelle's Sparkle City: A Delightful, Wonderful Day

I am so excited about my friend Shimelle’s latest collection for American Crafts: Sparkle City! This fun and energetic collection features everything from cityscapes to cotton candy, and a beautiful range of color and graphics. Today, I’m so happy to share my first project using this fabulous collection:

AmericanCrafts_MeghannAndrew_WonderfulDay_01.jpg

Supplies* | Sparkle City collection: Polka Dot Pansy paper (351357), Traffic Jam paper (351353), Stay Super paper (351325), Fairy Lights paper (351355), Perfect Day paper (351356), cardstock and lenticular shapes (351333), rub-ons (351364), chipboard stickers (351331), foil foam phrase stickers (351328), foam and cardstock letter stickers (351329), washi tape spools (351337), acrylic stamps (351336); Head in the Clouds collection: Fairy Tale photos paper (349480), chipboard stickers (349469), cardstock stickers (349467), journaling pad (349471), sticker book (349473)

This layout documents my daughter and Shimelle’s Wonder Boy enjoying a fabulous day together in London, and I had fun matching the energy and happiness in the photos with the elements in Sparkle City. I began with layers of patterned paper to create my layout background, then moved on to embellishment. The best part? Sparkle City coordinates beautifully with Shimelle’s last collection, Head in the Clouds, so I was able to combine both collections to create something wonderful!

AmericanCrafts_MeghannAndrew_WonderfulDay_02.jpg

My title, created with chipboard and foam Thickers, was housed on the yellow strip of patterned paper to help it to stand out below my photos. The happy strip of washi tape added below helps to add color and interest.

AmericanCrafts_MeghannAndrew_WonderfulDay_07.jpg

Guess what? Rub-ons are back, and this collection has a fabulous set of rub-ons that go on like butter! I added the “have fun” rub-on to the Head in the Clouds journaling pad paper, then flanked it with the “important” stamp and fussy cut camera. I also LOVED using the Sparkle City stamp set to add stamped black stars around my page.

AmericanCrafts_MeghannAndrew_WonderfulDay_03.jpg

This little corner is the perfect example of how perfectly Sparkle City coordinates with Head in the Clouds! Here I used the Head in the Clouds “everyday adventurers” chipboard and fussy-cut teal camera alongside the red camera and bird die cuts from Sparkle City. This little corner makes my heart so happy!

I’d love for you to watch how this layout came together in my process video:

Be sure to watch the Scrapbook.com* store’s incoming new items each week to find the Sparkle City collection added to the “new products” section of the shop, and click “notify me” so that you can be one of the first to create something beautiful with it! Thanks for watching, and happy creating!

*Clicking these links will take you to the Scrapbook.com shop, and when you purchase, I receive a small percentage of the sale. It doesn't cost you any extra, so thanks so much for your support!

Zoo Crew with the Elle's Studio January Products

Yesterday I shared the newest kit release* from Elle’s Studio, along with an 8-1/2” x 11” layout, and today I’m switching gears to share an event-based, 7” x 12” pocket page layout, all about a colorful trip to the Houston Zoo with our besties. The colors of the kiddo’s bright coats on this cold day were perfect for using alongside this kit—no black and white photos needed here!

EllesStudio_MeghannAndrew_ZooCrew_01.jpg

On the front of the page, I created a title using the outline and solid Jane Alphabet Stamps—the largest that Elle has ever released. I love that they coordinate with the “XO” tag in the January kit, found at the base of my page. These are definitely my new favorite alphabet stamps and I love that they are large enough to use on layouts, but still great for pockets, too! The black and white polka dot puffy alphas were great for finishing off my title against the larger alphas.

EllesStudio_MeghannAndrew_ZooCrew_04.jpg
EllesStudio_MeghannAndrew_ZooCrew_05.jpg

This tag was created using the Love You printables—the tag was originally 3” x 4” and I stretched it to 4” x 4”. I love that you can make anything work with digital files! I simply added the “today was good” Happiness Found sticker, an acetate heart die cut and a wood veneer heart to embellish my main journaling tag.

EllesStudio_MeghannAndrew_ZooCrew_02.jpg

I kept the same colorful hues on the back of the layout, matching the tags to the coordinating photos by the most bold color in the photo. Not much more journaling was required, so I keep to mainly pretty filler tags.

EllesStudio_MeghannAndrew_ZooCrew_03.jpg

My favorite pocket on the back was created with the heart 4” x 6” tag from the January kit. From there I added “wild girls” using the black and white polka dot puffy alphas and “you are the best” with the Happy Heart stamp. Since three girlies enjoyed this day, I added three hearts: a die-cut circle heart from the January kit, a red acetate heart die cut and a solid wood veneer heart.

I love this spread, and the day that it records! Be sure to grab these supplies while they last in the Elle’s Studio shop, via the links in the gallery below. Thanks so much for reading, and happy creating!

*Clicking these links will take you to the Elle's Studio shop, and when you purchase, I receive a small percentage of the sale. It doesn't cost you any extra, so thanks so much for your support!

New Year, NEW Elle's Studio Kit!

Hello and happy new year! I’m excited to be with you to share the first release of 2019 for Elle’s Studio! Let’s take a look at the unboxing video I created of the new January 2019 kit and add-ons*.

What an amazing assortment of products, right?! The January kit will have you documenting the beginning of your 2019 in a beautiful way with its fresh color palette and versatile tags:

EllesStudio_January2018_01.jpg

Once you have your base established with the kit, these add-ons will have you embellishing to your heart’s content!

EllesStudio_January2018_Add-Ons_01.jpg

Last, but not least, don’t forget about the digital files! I loved using them on the layout that I’m sharing with you today. Whether you use the Love You printables, January print and cut labels, January 2019 digital cut file or the XOXO Pages digital cut file, your digital library will thank you!

EllesStudio_January2019_January-Digitals.jpg

My newest 8-1/2” x 11” layout is about my brother’s surprise proposal in a beautiful setting, and the January 2019 kit and add-ons were the perfect products to match to the photos to tell the story of his engagement.

EllesStudio_MeghannAndrew_On1Knee_01.jpg

I could not love this layout more! Check out how it all came together in my process video:

Didn’t this kit and that story go together perfectly? Be sure to grab the products you LOVE from this release now, as supplies are limited! You can also start a subscription with this kit, so that you don’t miss out on any exclusive kits this year, and you can bundle shipping! Just click the “monthly kit” tab and “subscribe” after you head to the shop.

EllesStudio_MeghannAndrew_On1Knee_07.jpg

Thanks so much for stopping by! You can find all of the products I used to create this layout by clicking through the products in gallery below, which will also take you to the ES shop! Happy creating with your new Elle’s Studio products!

*Clicking these links will take you to the Elle's Studio shop, and when you purchase, I receive a small percentage of the sale. It doesn't cost you any extra, so thanks so much for your support!

New Year Cards with American Crafts Sticker Books!

Hello there! 2019 is just around the corner, and today I’m here to share my first ever New Year cards with you. Yes, I said it! I’ve never made New Year greeting cards before, but when I received the new American Crafts All the Holidays cardmaking sticker book* and combined it with a few papers and embellishments, it was the perfect opportunity to change that!

Supplies | All the Holidays cardmaking sticker book, Vicki Boutin sticker book, Field Notes collection chipboard stickers, Field Notes collection washi tape, Bling sticker rhinestones, Shine On 6x6 paper pad, Shine On Forest paper, AC primaries cardstock

I fell in love with the large black and silver circle stickers that say, “Happy New Year!” and I decided to create a trio of cards to give to friends to wish them a happy new year.

My first two cards were created using the smaller silver, “Happy New Year!” stickers, and started off by layering colorful cardstock with neutral patterned paper from the Amy Tangerine Shine On collection. From there, I chose the colorful watercolor Field Notes collection washi tape, which set my color scheme for my three cards—purple, pink, orange, yellow and green.

The Vicki Boutin sticker book, my favorite sticker book in my growing collection, helped me to embellish with the year in colorful numbers, stars and arrows that say, “create magic,” and “time for some fun.” New Year cards wouldn’t be complete without some bling, so I added a few pink, purple and silver Bling sticker rhinestones.

I wanted to use the largest, “Happy New Year” circle for my third card, and with a sentiment so large, not much else was needed on the card. The colorful watercolor Field Notes collection washi tape created the perfect background, and after the sentiment sticker was added with dimensional adhesive, I added the large rhinestones to complete this quick and simple, but festive card.

You can find all of the products that I used to create these cards in the gallery below—it’s still a new year for as long as it takes to remember to write “2019,” so order today to send your own handmade new year greetings!

I’m excited to send these cards off to wish my loved ones a happy new year! I’d like to say the same to you, my lovely blog readers. I am wishing each and every one of you the best that life can bring in 2019! Happy creating!

*Clicking these links will take you to the Scrapbook.com shop, and when you purchase, I receive a small percentage of the sale. It doesn't cost you any extra, so thanks so much for your suppor

Close to My Heart Craft with Heart Kit: Be Merry

MeghannAndrew_CTMH_BeMerry_Double_02.jpg

I’m so excited to share my final layout of the year using the Close to My Heart Craft with Heart kit subscription! The December layouts did not disappoint with their festive colors and embellishments, and I created this 24” x 12” double-page layout about the things that make me merry at Christmas!

MeghannAndrew_CTMH_BeMerry_Double_01.jpg

Supplies | Craft with Heart December Kit, Living My Best Life stamp, 'Tis the Season Compliments, Fern-stitched ribbon, white pearls

By starting with the kit elements, and adding small amounts of coordinating Close to My Heart product, I was able to create a truly customized layout design that fit perfectly with the photos and story that I wanted to share.

Whether you follow the instructions to a “t” or do your own thing with the specially coordinated kit, I know you’ll love what you create! Check out the process video that I filmed while making this layout. In it, you’ll see how I used different-sized photos than the layout example, added a bit more embellishment using the beautiful 'Tis the Season CTMH products and stamped words that fit with my layout with the wonderful CTMH Boutique Scrapbooking Day-to-Day stamp. I also create pockets underneath my photos to add hidden journaling, a technique I use often.

Check out these wonderful and simple-to-create Close to My Heart Craft with Heart Kits today, to make quick and beautiful layouts that document your most special memories! Thanks for stopping by, and happy creating!

Elle's Studio December 2018 Kit + Add-ons Revealed!

It’s the final month of the year, and Elle’s Studio is going out on a high note with the new December kit and add-ons*! Take a look at my unboxing video to see all of the new product:

The December 2018 kit is perfect for documenting your holiday memories, time playing in the snow, and so much more! Just take a look at the beautiful colors included this month:

From stamps, cork, puffy stickers and beautiful gold acrylic, there is something for everyone in the add-ons this month!

EllesStudio_December2018_Add-Ons.jpg

Even though we don’t have much snow here in Texas, the temperatures are dropping and I found the perfect way to use the snowy-themed product released this month:

EllesStudio_MeghannAndrew_Time-For-Cocoa-Gifts_01.jpg

These embellished jars of homemade cocoa powder are the perfect gift for our neighbors, and they could not have been easier to create! Vinyl and the December 2018 digital cut file embellished my jars with pretty snowflakes, and the Snow Day journaling tags held the instructions for mixing the cocoa. The Wonder and Joy and Let it Snow stamps added cute phrases like “time for cocoa” and “yum” to small tags from the December 2018 kit. The final touches were added with wood veneer snowflakes punched and added with baker’s twine, and small hearts and twinkles from the Winter puffy stickers. Want to see the steps I used to create these cute gifts? Head to my Instagram feed where I’m sharing the step-by-step process!

EllesStudio_MeghannAndrew_Time-For-Cocoa-Gifts_08.jpg

Thanks so much for stopping by today! I can’t wait to see what you create with these new products! Shop the goodies that I used to create my jars today, and re-create them for your neighbors, via the gallery link below:

*Clicking these links will take you to the Elle's Studio shop, and when you purchase, I receive a small percentage of the sale. It doesn't cost you any extra, so thanks so much for your support!

Elle's Studio December Reveal: Main Street Magic + Process Video

I loved working with the December 2018 kit and add-ons from Elle’s Studio this month! Check out my first blog post for the unboxing video that I created with all of the new goodies, where you’ll also find perfect DIY holiday gifts for friends and neighbors created with the kit and add-ons. In this blog post, I’m sharing a brand new 8-1/2” x 11” layout with you, all about the magic of Main Street U.S.A. in Disneyland!

EllesStudio_MeghannAndrew_Main-Street-Magic_01.jpg

I created a process video while making this layout, and in it, you can see how I created my title with the new Large Jane Alphabet Stamp Bundle, created a colorful border strip and tried to balance all of the beautiful colors I have on this page:

Don’t you just love that title? I sure do, and I can’t wait to go back to Disney to record even more magical Christmas details on Main Street.

EllesStudio_MeghannAndrew_Main-Street-Magic_02.jpg

Shop all of the product that I used to create this layout while supplies last via the affiliate gallery below, and thanks so much for your support!

*Clicking these links will take you to the Elle's Studio shop, and when you purchase, I receive a small percentage of the sale. It doesn't cost you any extra, so thanks so much for your support!

American Crafts Journal Studio Notebook: Lizzy 2018

I’m so excited to be sharing my first project using the Journal Studio Collection* from American Crafts! I’ve decided to document 2018 from my daughter’s perspective, creating two spreads for each month of her year. I want these spreads to focus on her interests, her activities and the highlights of her year. The Journal Studio Collection was perfect for this task, as everything coordinates perfectly and takes the guesswork out of creating!

AmericanCrafts_MeghannAndrew_JournalStudioCollection_HelloLizzyNotebook_01.jpg

Supplies | (If an item is not available, click “notify me when in stock” to grab it when it is back in the shop!) American Crafts Journal Studio Collection: Watercolor Stripe journal kit, Hello journal insert, Amy Tan sticker book, Amy Tan washi tape, Journal Studio sticker book, Journal Studio ephemera, Journal Studio mini puffy stickers, Journal Studio Dreams paper clips, Good Vibes Only gel pens; Sunshine and Good Times Collection: Rainbow Love paper, Shine Bright paper, Major Heart Eyes paper; Other: Dear Lizzy Lovely Day Thickers, Dear Lizzy clothespins (I like to keep my notebooks open with these when photographing)

I started off with a photograph from my daughter’s birthday in January, keeping the pages and layers super simple, and non-dimensional. Both the Amy Tan sticker book and Journal Studio sticker book have so many options for awesome embellishment, it was hard to choose what designs to select!

AmericanCrafts_MeghannAndrew_JournalStudioCollection_HelloLizzyNotebook_02.jpg

These alphabet stickers were included in the Journal Studio sticker book, and could not have been more perfect for adding a title in that speech bubble sticker!

AmericanCrafts_MeghannAndrew_JournalStudioCollection_HelloLizzyNotebook_03.jpg

This is my favorite spread from my creative session, and documents my daughter’s first experience with snow at our home in Texas. I just love the color scheme on this page—those sherbet colors are perfect for each month of the year!

AmericanCrafts_MeghannAndrew_JournalStudioCollection_HelloLizzyNotebook_04.jpg

The sweet heart stickers radiating out of the lovely die-cut house from the Journal Studio ephemera created the perfect embellishment for this spread.

AmericanCrafts_MeghannAndrew_JournalStudioCollection_HelloLizzyNotebook_05.jpg

I kept this rainbow paper for just such an occasion, and I love the way it tied both halves of my spread together here, on this layout that documents my daughter’s besties and a trip to the zoo.

Watch this process video, as I create these pages, and talk all about how I’m tackling this extra project at the end of the year:

Thanks so much for stopping by and watching my video! I’d love to hear what you think about traveler’s notebooks and the new Journal Studio collection. You can check out the products I used in the gallery below, available at Scrapbook.com! (If an item is not available, click “notify me when in stock” to grab it when it is back in the shop!)

*Clicking these links will take you to the Scrapbook.com shop, and when you purchase, I receive a small percentage of the sale. It doesn't cost you any extra, so thanks so much for your support!

Altenew Crafty Friends Blog Hop Day 1 + Giveaway

Crafty Friends Blog Hop Graphic.jpg

Hello and welcome to my blog for the Altenew Crafty Friends Blog Hop! You’ve come here from the talented Zsoka Marko’s blogI

I am so excited to be a part of this industry of creative people, where I am inspired every day to create something new, and I love that this hop celebrates the support and kinship that we all give to one another! I’d love to connect with you on Instagram, where I’m most social! Now on to the crafty stuff! I have a new 12” x 12” layout to share all about this special job of mine:

Altenew_MeghannAndrew_HappyCreating_01.jpg

Supplies | Our Family scrapbook collection, Mega Greetings 2 stamp and die bundle, Crafty Life stamp and die bundle, Snapshots stamp set, Altenew glue tape

It’s quite rare that I have a photo of myself in front of the camera in my scrap space, and not just my hands for a process video! I wanted to create this layout all about how I love my job and pinch myself every day that I get to create for a living.

Altenew_MeghannAndrew_HappyCreating_04.jpg

After I had my photo decided, it worked out perfectly that I could create my stamped title of my signature tagline, “happy creating,” using the Mega Greetings 2 and Crafty Life stamp and die bundles. I love the way that they look layered on top of each other in the mint green and teal blue ink.

Altenew_MeghannAndrew_HappyCreating_05.jpg

How perfect is this sentiment?! All around my layout, I included stamped elements from the Mega Greetings 2, Crafty Life and Snapshots stamps, along with fussy cut leaves, die cuts, enamel dots and beautiful patterned papers from the Our Family scrapbook collection.

Altenew_MeghannAndrew_HappyCreating_02.jpg

I love this layout, and I hope it has inspired you to document your love for paper crafting just like I did here! Tag me on Instagram when sharing your unique page! Now on to the prizes:

Altenew is giving away a $50 gift certificate to 5 lucky winners and one Altenew Academy class to 5 lucky winners. There are also 10 awesome friends who are celebrating with us, and they are offering the following prizes:

How do you enter to win one of these awesome prizes? Simply leave a comment at every stop along this hop list:

Altenew Card Blog

Jennifer McGuire

May Sukyong Park

My Sweet Petunia

Kathy Racoosin

Norine Borys

Chameleon Pens

Svitlana Shayevich

Kristina Pokazanieva

Raquel Bowman

Keeway Tsao

Butterfly Reflections Ink

Virginia Lu

Laura Jane

Simon Says Stamp

Lilith Eeckels

Dana Gong

Alex Syberia

Stamp & Scrapbook Expo

Zinia Redo

Jessica Frost-Ballas

Zsoka Marko

Meghann Andrew < you are here

Kay Miller

Be sure to leave comments by Sunday, December 9th, 2018 for a chance to win! 35 winners will be chosen at random from the comments left on all of these blogs listed below and will be announced on the Altenew Card Blog and Altenew Scrapbook Blog on December 15th, 2018. Good luck! Finish out the hop now by visiting Kay Miller for more inspiration. Good luck and happy creating!

Crafty Friends Blog Hop Sponsor Graphic.jpg

Close to My Heart Craft with Heart November Kit: Holly Jolly Snow Days

Living in Texas, we hardly ever get to experience snow, which I hate for my daughter. I always enjoyed the changing of the seasons, and the first snowfall of the year was always a magical day for me. On Boxing Day 2017, we woke to a beautiful, fresh morning of a few inches of snow, and I bundled my girl up and pushed her out the door to enjoy it. Today I’m documenting her excitement playing in the snow using the Close to My Heart Craft with Heart November Kit!

MeghannAndrew_CTMH_HollyJollySnowDays_01.jpg

This kit could not have been more perfect to for these photos. The colors and the subject of what I needed to document seemed to be made for this layout! Once I had my photos placed, I tweaked the title a bit by adding the playful Erin’s Hand Alphabet Stamp to what would have been the journaling tag, to add the word “snow.” I love how it adds to the page, and that pink heart on top of the tag gave such a bright pop of color to the title!

MeghannAndrew_CTMH_HollyJollySnowDays_04.jpg

I also loved adding some coordinating embellishments to this spread, like the gorgeous Oh What Fun felt shapes for added texture, the white pearls to bring that snowy pearlescence and the Sugarplum glitter gems for a bit of sparkle!

MeghannAndrew_CTMH_HollyJollySnowDays_06.jpg

I stamped the “enjoying today” sentiment from the Boutique Scrapbooking: Day-to-Day set and added my journaling above and below my photos, with printed cardstock strips.

MeghannAndrew_CTMH_HollyJollySnowDays_07.jpg

Check out how this layout came together quickly and easily in such a beautiful way, in the process video I’m sharing on my YouTube feed:

Be sure to subscribe to my YouTube feed (you can find a link in the right sidebar >>> ) to see what I create with next month’s Craft with Heart kit! Until then, happy creating!

Elle's Studio November 2018 Kit + Add-Ons in Pockets

Hello there! In case you missed my Elle’s Studio November reveal blog post, be sure to click here to watch my unboxing video to preview all of the new goodies in the shop this month!

In this post, I’m going to share my second project with you, created with the November 2018 kit and add-ons*, a 24” x 12” pocket page spread, which I created to document November of 2015, a hole in my monthly album!

EllesStudio_MeghannAndrew_November2015Pockets_FullSpread_01.jpg

This kit was just perfect for all of my photos! I had so many deep blues and bright reds, as well as green, and the themes in the kit this month could not have been more perfect either. I created my 4” x 6” title tag using the ledger tag from the November kit, which I accented with my favorite add-on this month, springs of greenery from the Merry Moment stamp. I also punched a red circle from the Merry and Bright 6” x 6” paper stack, and accented that grouping with a Christmas hand drawn acrylic heart. I stamped “hello” using the Title Builder stamp, then added “November” with the new navy puffy alphabet stickers.

EllesStudio_MeghannAndrew_November2015Pockets_Left_02.jpg

You may have noticed this 3” x 4” tag in the Elle’s Studio sneak video on Instagram (which we release every month on the 1st!). The “the stockings are hung” phrase can be found in the This Season phrase stickers, which have a wide range of phrases which can fit for your November and December stories! Then I added the fabulous red Jane alphabet stickers to add “deck the halls,” and accented with a die-cut arrow from the November kit, a stamped heart from the Merry Moment stamp and a Christmas hand drawn acrylic heart. It was the perfect tag to point to the photo of our house lit up with twinkle lights!

EllesStudio_MeghannAndrew_November2015Pockets_Right_02.jpg

I couldn’t forget about the beautiful blue hue in the kit! I grabbed the blue dot pattern found in the Merry and Bright 6” x 6” paper stack to create a custom 3” x 4” tag, then stamped the “a day to remember” circle with the Merry Moment stamp and fussy cut it out, adhering it to the patterned paper. Last, I added a long journaling tag, found on a 4” x 6” tag in the November kit, adding the word “proud” with the navy Jane alphabet stickers and another This Season phrase sticker. I love that this tag spans three different pockets to tie them together!

I know you will love using this kit and coordinating add-ons to tell your stories, whether inside or outside of the pocket! Be sure to shop all of the products that I used to create this spread in my shapable gallery below, which will take you directly to that product in the Elle’s Studio shop! Happy creating!

*Clicking these links will take you to the Elle's Studio shop, and when you purchase, I receive a small percentage of the sale. It doesn't cost you any extra, so thanks so much for your support!